Sunday, November 26, 2017

Sewing Machine Cover

Pic taken in the summer, love the view of sunflowers
My Bernina 1230 is in a cabinet in front of a large picture window facing west.  This is a very welcoming place to sit and sew for hours, but it is not a great place to leave a sewing machine for extended periods of time. Every afternoon, the sun shines directly into the window before dipping behind my neighbor's roof line. I do have curtains on my windows and these are usually pulled partway closed to protect my machine from direct sun, but in the winter I like to keep the curtains open so that we can soak up some heat in the short hours before darkness falls. Along with the sun exposure, my machine has to put up with more than its fair share of cat hair. This window provides the perfect place for napping cats and there is at least one cat luxuriating in the sun on any given day.  They drape themselves around the machine, sprawl on the cutting board, and test gravity by pushing things just over the edge of the table. Then when they are fully recharged or they hear someone making dinner, off they go, lickety-split. There are telltale signs that you have been visited by a cat though. Someone has munched on the plant leaves, your pattern pieces have been filed/wedged on the floor between the cabinet and the wall, and wisps of cat hair settles on any and every surface.  I'd like to minimize the amount of that cat hair that gets to settle on/in my machine.
A couple days ago I mentioned to T that I should make a few machine covers. That was me verbally putting it on my to do list. Later that day though, T sent me the link to a Threads article from 2011 for a tutorial on making a sewing machine cover. That was pretty sweet of you, T, thank you. After reading through the tutorial and deciding it was something I could tackle, I started looking for fabric. My first choice came from a remnant that I got when my sister-in-law had me check on some free bags of fabric she saw listed online. They were in my neighborhood and, of course, I drove over to claim the bags immediately. It was mostly upholstery remnants and I didn't find much that I needed to keep, but this particular piece had farm animals on it and I couldn't pass that up.
It was hard to cut through any animal, I wanted them all on my cover
I took measurements of my machine and then using the tutorial, I measured and cut the 5 rectangles that went into making this cover. Instead of one continuous piece for the main cover, I cut it in half and put a seam across the top. This way, the animals would drape right-side-up on the front and back sides of the cover. I opted not to put in a handle opening now.  Maybe it will get added later, but this machine doesn't get out of its cabinet, so I don't see the need for a handle yet. Rectangles are easy to cut and I was ready to start sewing in short order.
The pocket that spans the front of the cover got finished with black seam binding out of the leftovers bin.  
It is upside down from the back, but right side up when finished
The tutorial included rounded end covers, but I stayed with the rectangles.  The corners aren't perfectly square, but that's not a problem on a sewing machine cover.  There was enough sew binding left over to finish the bottom edge of the cover as well.
Finished cover
Here's the cover in action. The pocket offers a good view of a pig, chick, and sheep, but I don't know what, if anything, will be stored in there. Cover number one is done, now let's find some more fabric for the others and make sure all of the ladies are well dressed.


Wednesday, November 22, 2017

Marlene's Quilt

My sister made this top a couple years ago, but she moved into a new house this year and was hoping to get it finished and hanging up on the wall.  She does not have time to quilt anything right now, so I offered to take on that project. Now that it's finished, I went back to see what pictures I could find to document the process and wouldn't you know it, I didn't take any 'before' pics. Oops. This is the earliest one I could find.  Clearly, I had already been working on it for awhile and 3 edges are quilted.
Originally, I had it on a floor frame but I quickly changed to my smaller Q-Snap frame
Closeup of a block before quilting
Slow going when you have a frame and Stewie on your lap
Other nights were more productive 
Quilting is finished
At this point, I handed off the quilt to mom who put on the binding and added a hanging sleeve on the back.
Beautiful
Dark binding was a good choice
Mom will deliver the quilt to my sister over Thanksgiving.  I hope she loves having it on her wall.


Tuesday, November 21, 2017

Polka Dot Blouse

The pattern is Eve, a pleated blouse from so-sew-easy.com.  It says this pattern is for intermediate sewists.
Background is see-through, polka-dots are constant
There are only two pieces to this pattern.  The front gets cut on the fold and the back gets cut as two separate pieces.  I used the rotary cutter for this one.
Pottery makes good fabric weights
 Sewing starts with the french seam down the back and then moves on to the pleats on the front.  There are six pleats on the front and they folded into place pretty easily.
Pinning the pleats
 The pinned pleats get staystitched and then it moves onto the shoulder and side seams. I finished all of these with french seams.
Pleats are staystitched
The last step is to hem the bottom and sleeves.  I love the color and polka dots in this fabric and it is so lightweight and flowing.  At times I felt like I was cutting and shaping water.  Every seam was thoroughly pinned before I went anywhere near the sewing machine.
Finishing hem on sleeves
 This shirt now looks finished from the inside and outside.  It's not actually reversible, but it could be with the right fabric choice if don't mind seeing the seams.
French side seams meet bottom hem
 I used blue bias tape to finished the seams.  It's a little lighter blue than the fabric. The bias tape doesn't lay flat all the way around the keyhole, but that doesn't bother me.
Finished keyhole
 Here are a few finished pics on the dress form.  Yes, this blouse will need camisole or tanktop underneath it when I actually wear it.
Finished front view
Pleats look great up close

Finished side view
If I make this pattern again I will increase the length by a couple inches and probably try the larger size. This shirt is a bit tight across the back shoulders.

Back view with french seam in the middle and keyhole up top
I am so pleased with how the keyhole in the back and the pleats in the front look on this shirt.  Now, I need to find the perfect layer to wear underneath that will allow the polka dots to shine.

Saturday, November 18, 2017

Bernina 717

This post was written months ago, but apparently, I forgot to publish it. I went back to look for it after writing about my most recent project on it. It's a bit late now, but Bernina 717 deserves to share her story.

She was listed on Craigslist in a different state.  A Bernina 717 in a cabinet and reasonably priced, so I had to see if I could get her back to Chicago. The machine was up near Mankato, MN which is between the Twin Cities where my sisters live and Chicago. Ok, not really on the way, but for a Bernina a bit of a side trip could be made.
Originally, I was planning to be in the Twin Cities before Valentine's Day to meet my new niece.  She turned out to not be in a rush and missed her due date by at least a week. So, I did not end up going to MN until about a month later. Mom went up after my niece was born to help out though and when she came home she was willing to make a detour through Rochester, MN on her way back to Illinois. The lady who was selling the machine had infinite patience and I really do appreciate her giving me time to sort out how to get the machine home. She even helped me look into the cost of shipping the machine when travel plans were up in the air.
The machine had a cabinet, foot control, and power cord, but there were no accessories or manual.  I put the machine in the front room with a view out the window for awhile until I could clean her up and try her out.
In front of the sunny window
Here is a close up of the machine before I cleaned her inside and out. The hand wheel shows wear, but most of the other scuffs and discoloring should clean up.
The first step was taking her out of the cabinet and then I took a look inside. While the machine did sew, clearly it was not running as smoothly as it could.  There was quite a build-up of gunk on some of the gears. Q-tips and alcohol got it cleaned up, but it was a red substance caked on there that I hadn't seen before. Usually things turn brown, but this was a decidedly red jelly substance. Is there a grease or oil out there that is red colored?
Distinct red coloring isn't noticeable in this picture
 The zig-zag lever was frozen and I used heat and Tri-Flow to get is loosened up.  The needle position piston was also stuck so I couldn't move the needle right-left-center, but that loosened up as well with heat.
The back side needed cleaning and the pressure foot lifter and spool pins had a bit of rust
Here she is all cleaned up and back in the cabinet.
Almost looks brand new
Has anyone reading this used a Bernina 717 before?  Any comments, suggestions, warnings as I look for a project to try out on this machine?

Scrappy Letters


Yesterday I searched for a project that would use up some of the fabric scraps I had left over from the wall hanging I made last weekend. Originally, the fabric came in a bundle of 5"x 5" squares and after putting together a small quilt, some of the leftover pieces were pretty small.  
I finally decided to make a fabric alphabet after finding a source for free letter patterns on the website chezbeeperbebe.blogspot.com. Each of the letters is under 2" square and I thought I could use almost all of my scraps.
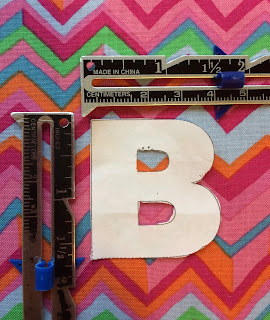
Letter size
There was an accompanying tutorial from 2009 on the website as well, but I ended up making up my own directions. I didn't want to put magnets into the letters, and I chose not to take the extra step of tracing the letters on the fabric.  I just cut out the letters and then held them down while I sewed around the edges. All the outlining was done in a bright yellow thread and a narrow zig-zag stitch on my Bernina 1230. This was the first time on the 1230 that I used the needle down function for the entire project and it worked very well. Of course, my lines are not perfectly straight and sometimes I ended up sewing through the paper a bit, but I am happy with the finished look.
Some letters ended up with partially sewn edges
I started out with the goal of getting through the alphabet and I knew I had enough fabric for that.
A-Z in fantastic fabrics
When I finished those 26 letters though, I decided I may want to actually use these letters for a toy for my nieces. They're not ready to read or spell yet, but I think they may have fun playing with the letters in the future. To extend the range of words one could spell with this letter set, I decided to use all of the remaining scraps to make as many letter doubles as I could. There weren't enough scraps for a full second alphabet, but I ended up adding 14 doubles. As you can see from the first pic in this post, I played around with various phrases to see what letters would be most helpful. Yes, I did get a second "S" made after the creative spelling in that pic.
This was a fun and relatively quick project.  I'd be willing to try it again when I have a good collection of scraps calling out to be put into service.