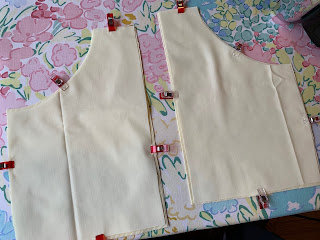
These shorts were so fun to make and I'm thrilled with how they turned out. I have used this pattern before, but this time I wanted to concentrate on fitting the waistband. My earlier attempts were mostly too loose and there was gaping in the back. I had also never actually put in the belt loops so I planned to give those a try.
Other than the pattern which I purchased ago, I was able to pull all the pieces I needed for these shorts from my stash. The fabric is from Lillian, the pocket lining is from a lady in Wilmette who had me service her machine so that she could give it to mask makers, matching thread is from Cedar Rapids when I bought my Bernina 1230, the zipper and snap came from school as they are discontinuing the sewing classes, and the button is from my Aunt Janyce's collection. This was a fantastic example of making do with what you've got.
 |
| Fabric has faded areas and a couple stains |
 |
| Pocket front top, pocket lining bottom |
 |
| Matching pockets to lining |
 |
| Sewing pockets to lining |
 |
| Topstitched pocket openings |
 |
| Pockets attached to short fronts |
Next, I worked on the invisible zipper. I tried to follow Kenneth King's tutorial on invisible zippers and while I'm happy with how it turned out, the zipper is definitely not invisible. I didn't have a yellow zipper and ended up using a tan one.
 |
| I liked King's process for inserting this zipper |
 |
| Belt loops |
 |
| Belt loops and waistband ready to be basted |
 |
| Fish eye dart |
This fabric frayed non-stop. Every time I got up for sewing I was covered in yellow threads and fuzz. When I was hemming the shorts I decided to serge the edges first to minimize the unraveling. Then the hem was turned up 3/4" and secured with a zig-zag stitch. The button is decorative and there is a large snap underneath it. Both the snap and the button were sewn on by hand.
 |
| One-of-a-kind button |
 |
| Back pockets a bit faded, but have small flower detail in stitching |
Pictures were taken in the back yard on a very sunny day. I had been sitting for several hours already in the shorts as I wrapped up school work for the year. There are wrinkles and shadows in the pics, but that's a glimpse as to how the shorts wear in the 'wild.'
 |
| Let's see that button |
 |
| From the back |
 |
| Side view |
 |
| Zipper is not invisible, but it works perfectly fine |
 |
| No gaping when I sit down |
 |
| I can bend over in the garden and not show my cheeks |
 |
| Spring yellow complements the Clematis and the Lilac bush |

No comments:
Post a Comment