Saturday, October 19, 2019

Scrappy Irish Chain

In the garden
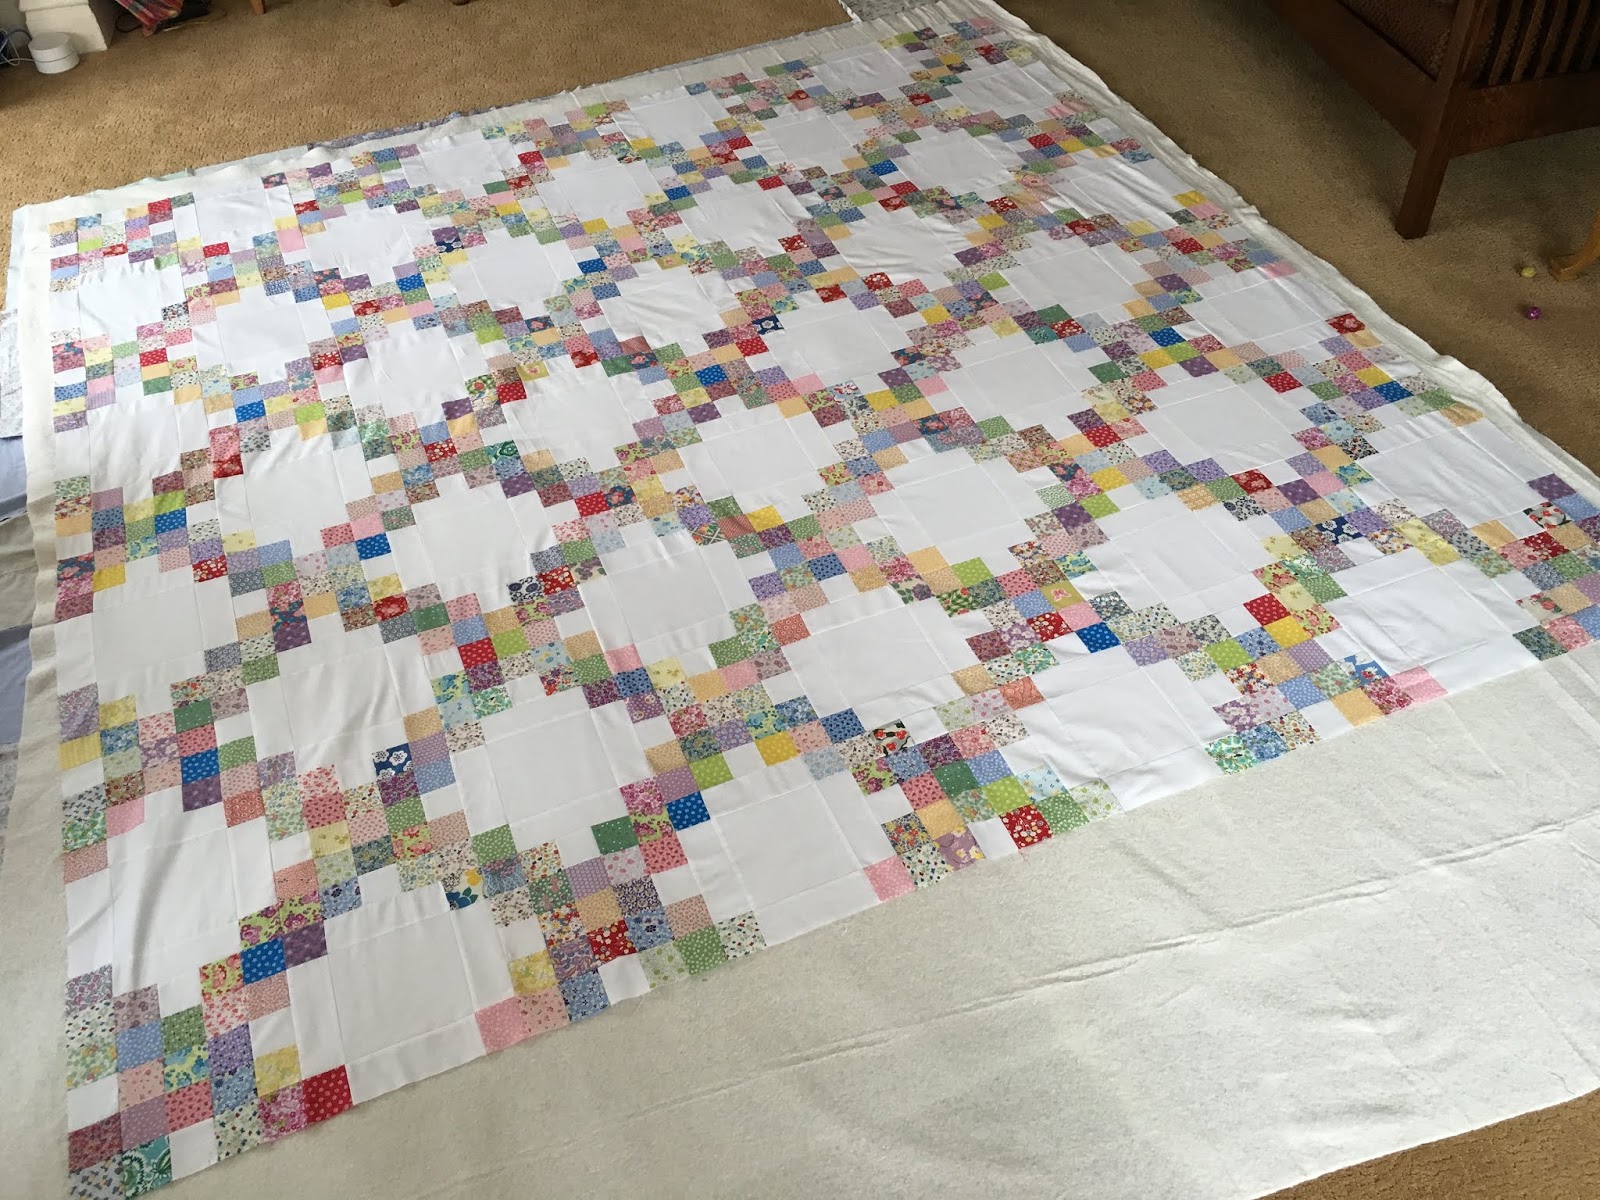
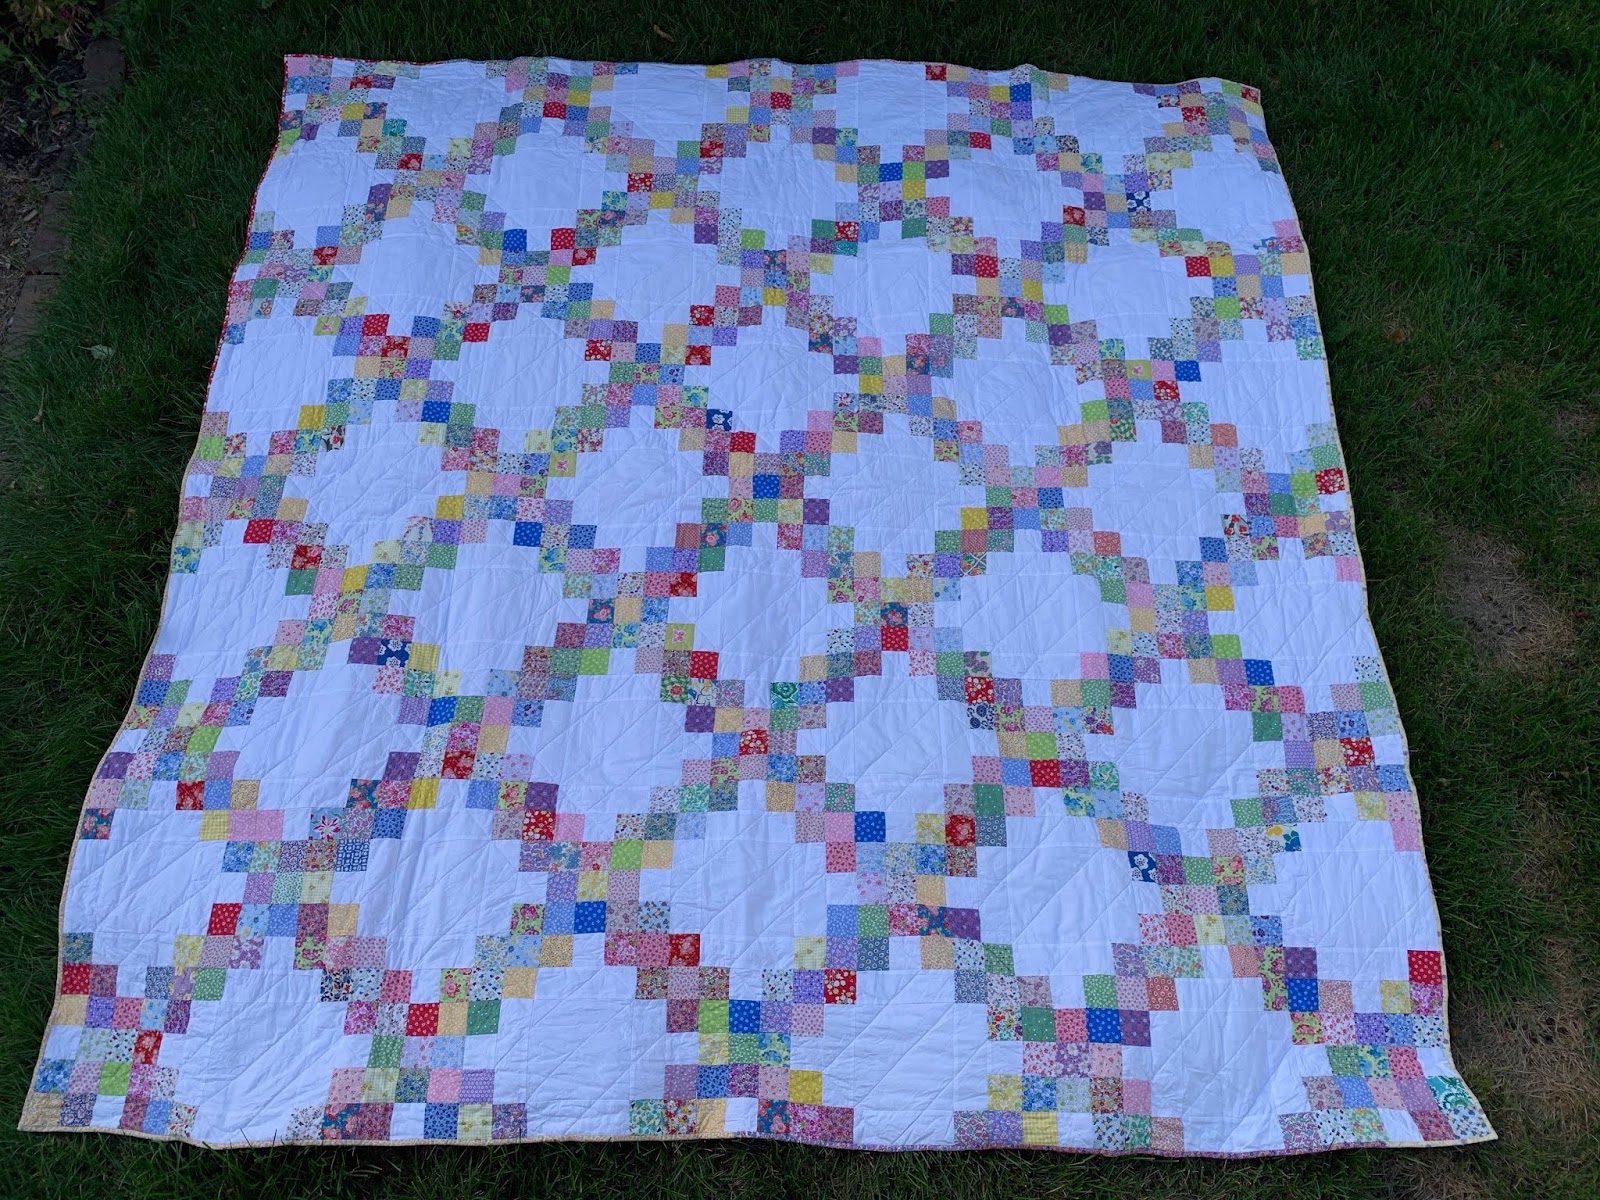
This quilt was started a few years ago when I was looking for a quick way to put together a scrap quilt. In true scrap quilt fashion, the fabrics here are leftovers from different projects. I started with fabrics that came from a couple jellyrolls I had used on other projects and then moved on to flour sack remnants. There is also a fair number of pieces from mom's collection and a few from the scrap bags that my sisters gave me. There's even a couple squares that came from my aunt Ellen. With so many choices of fabrics to include, I decided to work with two unifying themes. The first is that most of the prints have bold colors and the second is that 99% of the prints have flowers in their pattern. Those themes are carried though in the pieced top, the backing, and the binding.
December 2018, a few blocks completed
I thought this was going to be a relatively quick top to piece, but after a gung-ho start in 2016 I got distracted. Over the next three years, I pulled out the pieces for a couple weekend sewing sessions, but found myself working on other projects most of the time.
Last year, I decided that I wanted to finish the quilt. At the November or December meeting of Loose Ends, my friend Nancy was looking for a project and she ended up cutting quite a few colored 2 1/2" by 2 1/2" squares so that I could finish the individual blocks. Thank you, Nancy, that motivated me to focus on this project again. Over winter break, I moved the dining room furniture and spread out the blocks on the dining room floor for a couple days. While a few podcasts and movies played in the background, I happily pieced the rest of the blocks and then arranged and sewed those together. By the end of winter break, when it was time to go back to work, I had the top sewn together.
One row at a time
January 2019
Pieced with the Pfaff 131
January, finished piecing

In February, I took the top over to mom's house. For the backing, we just pieced together an assortment of light blue/green florals from mom's stash. Several fabrics were used up completely here, but I don't think you'd notice any decrease in the overall collection. Basting is easier at mom's because she has room to lay out a large quilt and she has carpeting. Pinning would cause unnecessary damage to my wood floors.

Pressing before basting
View of back
Ready for basting
For the quilting, I set up my Bernina 1130 with the walking foot on the dining room table. I needed the extra workspace to lay out the quilt.

My assistant tends to slow down progress
Sneaking in a catnap before we continue working
Remaining bold color fabrics were pieced together for the binding.

Trimming
Binding ready to be finished by hand

Binding with thread Kula gave me on my 40th birthday
The binding was finished on Oct 13 and then I washed and dried the quilt overnight.

Finished size about 90" side square
Quilting in two directions
Quilting visible on back

Friends and family contributed materials and time to the making of this quilt. It's a scrap quilt, a fabric scrapbook full of memories.

Saturday, September 7, 2019

Corduroy Shirt Dress

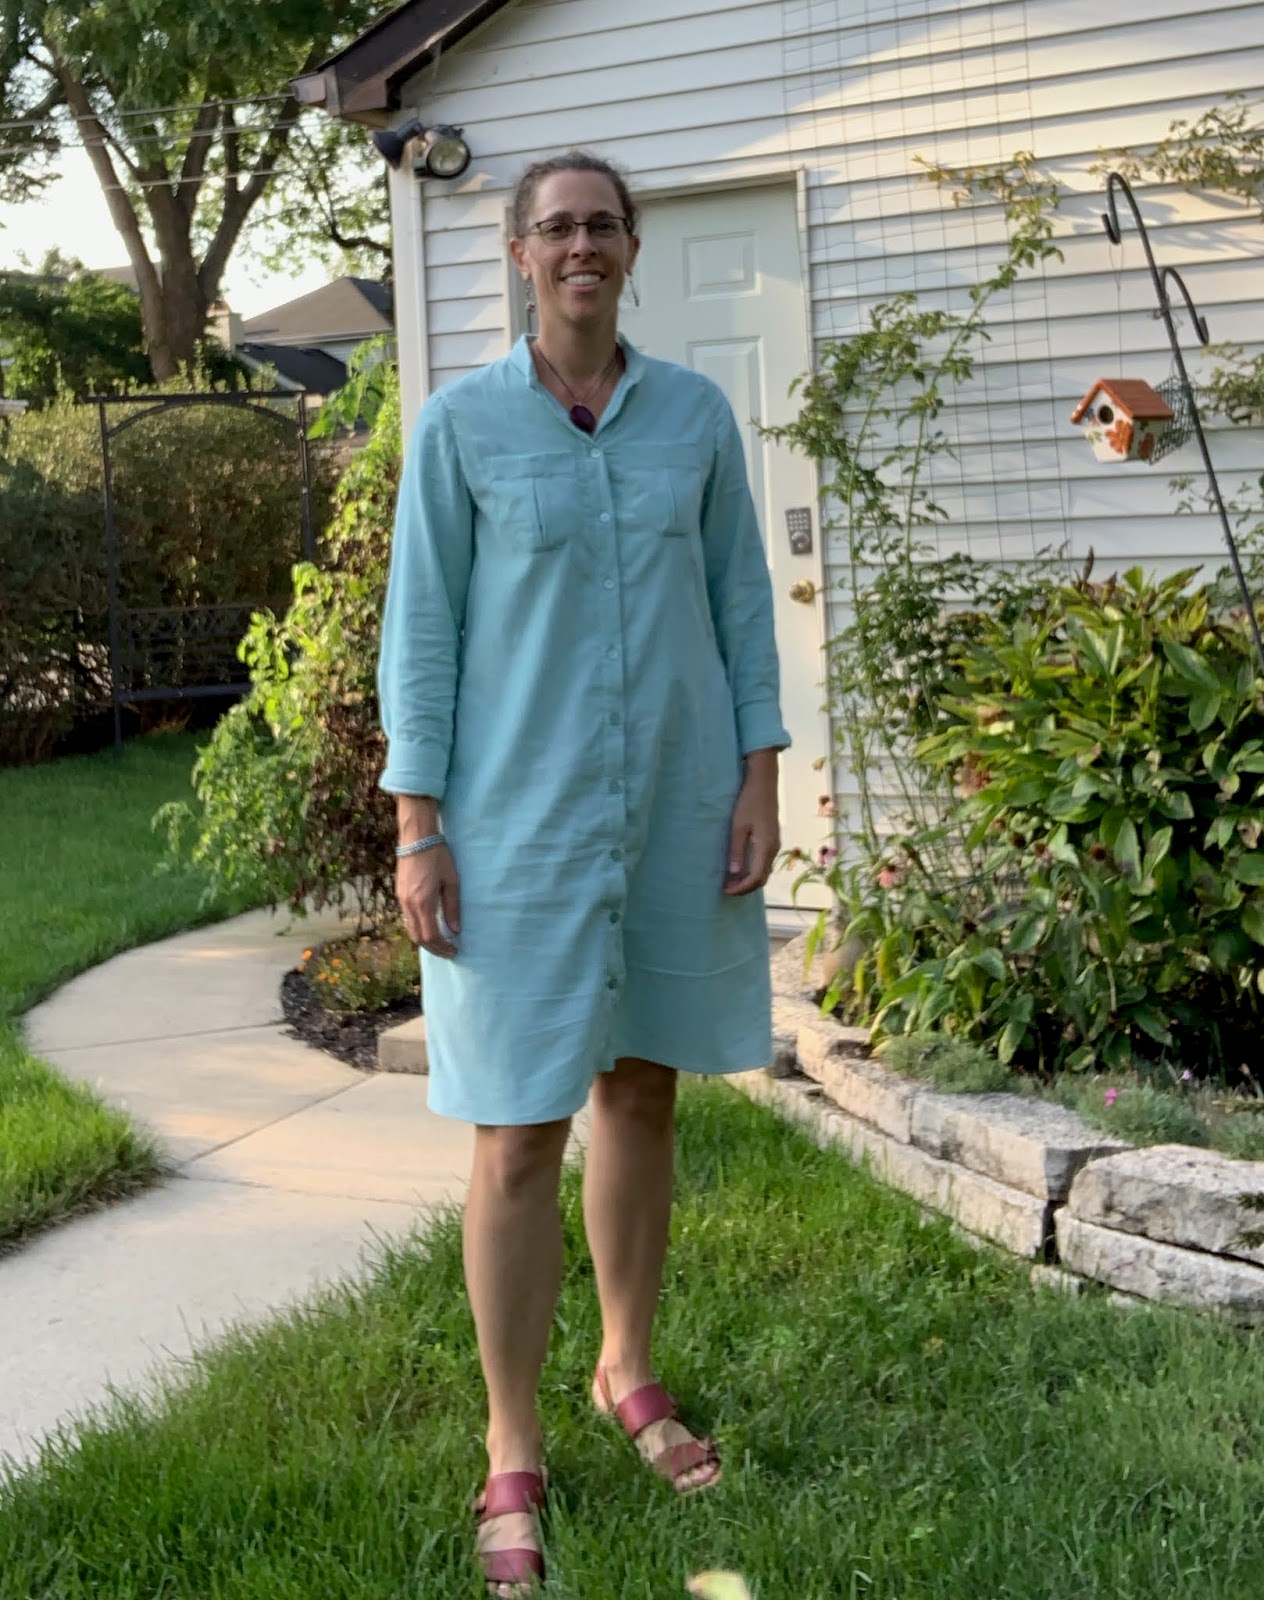
Dress to match the sky
B5526


This pattern is my TNT Butterick 5526. This time, I again opted to lengthen the shirt into a dress and I used view A with the front pockets as the base. The sleeves are full length and I did not put in the sleeve tabs. I do find myself wearing long sleeves rolled and unrolled throughout the day. I also opted to leave off the collar and only used the collar band. Inseam pockets were added as I missed these on an earlier version of the dress.
The blue corduroy fabric is from Lillian and while it had quite a few stains or imperfections throughout, fortunately, there was about 6 yards of material to work with while cutting. I tried to cut around as many flaws as I could, but I had to incorporate several marks in (hopefully) somewhat inconspicuous places.
Very difficult to photograph the true color, but imperfections are visible
Originally, I did cut out a collar, but in the end I did not use it.
Collar I ended up not using and rust stains on selvedge
For sewing the dress together I set up two machines. My Bernina 1230 for seams and my Bernina 717 for the top-stitching. I did audition several colors for the top-stitching, but ended up not thrilled with anything I had on hand and made a trip to Vogue to pick up a matching blue color.
3 options that did not get chosen
The pattern starts with sewing up the front pockets. I changed the square shape by taking off the bottom corners. This made the pockets a bit smaller and took very little extra time.
For this picture the pockets are two different lengths, I fixed that
The rest of the dress went together quickly. For the side seam pockets I tried to put them in myself the first time, but had to take them out and watch a short how-to video on YouTube before I finally got them inserted correctly. To help them lay a bit flatter, I top-stitched the front of the pocket opening. The fabric for the pockets is out of the scrap bin and is an old pair of floral sheets. The little blue flowers match the dress perfectly.
I had planned to use some buttons out of my stash, but there was nothing in the box that had enough of the same button to do both the front placket and the cuffs. A trip to Vogue provided buttons that matched extremely well in color.
Plenty of buttons to finish this project
At first, I had the buttons spaced at 2.5 inches apart, but when I compared this to a RTW shirt I found that I could move them out to 3.5 inches apart.
2.5 inches apart
Buttonholes were done on the Singer 201, as usual and I used the same blue thread as had been used for the top-stitching. When it came time to sew on the buttons though, I had a bit too much help.
Pet me instead of sewing on buttons
The buttons were sewn on by hand and I opted not to put any on the front pockets. I don't keep anything in front pockets and they don't need to fasten closed.
Most of the pictures of this dress were taken at work and clearly, I do not do very well with the tripod and timer.  Here's the best of the bunch. 
Dress was ironed before I drove to work
Love having pockets
Back view

Front pockets and buttons looks great
Inside of pocket
One pic at the end of the day
This dress was very comfortable all day. The fabric is soft and lightweight and it feels like wearing pajamas. I hope it will transition well to cooler weather in a few weeks. I plan to pair it with leggings and a scarf.


Sunday, August 18, 2019

Tamarack Jacket Wearable Muslin

Tamarack Jacket in August
This jacket was made last November, but I haven't posted about it. Here's what I remember about the construction.
The cream exterior fabric is from a bag of scraps picked up from Freecycle. I don't know what the fabric content is, but it feels like something you would use for curtains or curtain lining. It has a bit of a waffle texture and seems to hold its shape pretty well. The lining is a piece of drapery fabric that Emily gave me at work.
Stewie approves cream fabric
This was my first attempt at making any sort of jacket or coat. The pattern is the Tamarack Jacket from Grainline Studio. I traced a size 16 except where I narrowed to a size 14 under the armscye down to the waist. The torso and sleeves were both lengthened 2 inches.
Floral lining for the sleeves
Cutting batting for back
For quilting the layers together, I used the walking foot on my Bernina 730 Record and evenly spaced horizontal rows. I could see where there are endless possibilities for quilting here, but I kept it basic for this first jacket.
Basted in reference lines for quilting
Quilting a sleeve
The seams in this muslin are not finished and I will definitely want to finish them on the next coat. There is fraying fabric and batting that I will not put up with next time.

Welt pockets were new for me and I watched a couple videos online, consulted a few sewing reference books, and followed the Tamarack Jacket sew-along instructions that Graineline Studio provided. I think they turned out well as viewed from the front, but the pocket lining is unfinished and I think it needs to be anchored to the inside of the jacket.
Floral pocket lining
At one point I really thought I had inserted the pocket flap upside down. I was sure that the flap should be hanging down from the top over the pocket opening. Since it was a muslin, I wasn't planning to go back and change that, but I did spend time rereading the directions and consulting the Grainline Studio sew-along to see what I would need to change for next time. It was in the sew-along that I realized the pocket wasn't constructed incorrectly, it just wasn't finished yet. The loose flap needed to be hand-stitched on the ends and secured to the front of the coat
I thought I had erred in my pocket construction, still need to attach flap
For the bias binding I used denim. The neckline and front opening of the jacket are selvedge and the jacket hem and sleeves are pieced denim strips.
Raw selvedge look adds great texture
Bias binding on front and bottom hem, one sleeve attached
Hook and eye fasteners were used for the front. I don't like how there are distinct gaps and spaces between the fasteners and I probably won't use those for the next jacket. I did see a tutorial for a zipper front somewhere in my research, I think I'd like to try that next time.
Denim pops against white 
I like the different lengths in front and back
Pocket linings inside out
The finished jacket looks pretty good from the outside, but is a bit messy inside. It's also a bit big across the shoulders. The light color exterior quilted in rows gives it a distinct Michelin Tire Man look. Before I make my first fashion fabric coat, I'll trace a smaller, size 14.
Increased sleeve length is good
Maybe make pockets a bit deeper


Still don't like gaps between hook and eyes on front
Good length in back

Thursday, August 15, 2019

Recovering the Ironing Board

Ironing board under a quilting project
I have a small, portable ironing board that was purchased 10+ years ago at Gruber's Quilt Shop in St. Cloud Minnesota. It came with a set of fold up legs that can be used to make a table, but I prefer to set it on top of a table or counter so that it is not too low down. Over time, the fabric top has become worn and torn. Several times it has gotten nicked by overzealous scissors when trimming loose threads.
Got a bit careless with the scissors
This was a fairly quick project. My neighbor kindly lent me a staple gun and I had a fabric remnant ready to go. After gathering my supplies, I set up my workspace on the back patio table.
Everything is ready to go
First step was to pull out all the staples holding down the fabric. There was a layer of batting under the fabric but that did not get replaced so those staples did not need to be removed.
Staples about every two inches along perimeter
Layer of wool underneath fabric remained in place
Next, I cut a rectangle from the remnant that was a little larger than my board. Then, T came outside and we worked together to stretch, fold, and staple the new fabric layer into place. We were almost done when the staples ran out.
Only a few staples short
After only a brief delay, I was able to borrow another sleeve of staples from my neighbor and then tack down the last corner. This fabric is quite a bit brighter than the last cover and it will be fun to use for the next decade.
Finished board ready for action