Sunday, July 28, 2019

White Denim Wrap Skirt

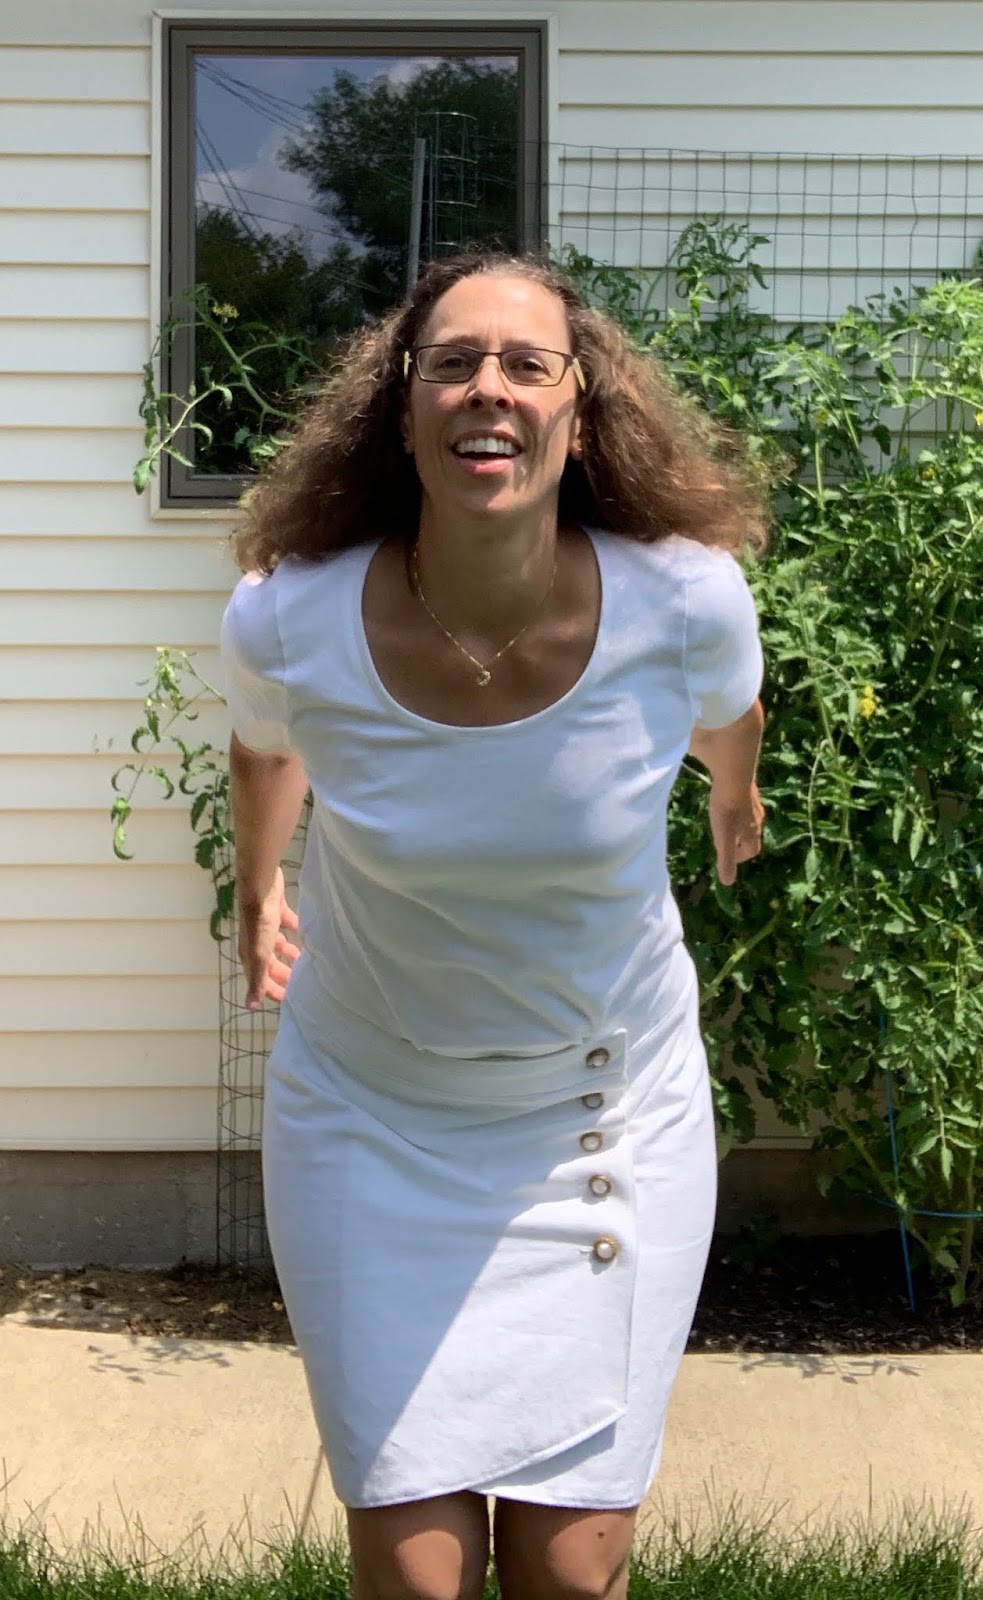
The skirt and the butternut squash plant look great
My first go-around with this Simplicity 8699 pattern was last fall. I used a lightweight denim and have liked almost everything about how the skirt has worn this summer. The only quibble I had with the pattern is that there were no pockets. This is understandable though, given that it is a wrap skirt, and I don't think that has actually deterred me from wearing it regularly. Earlier this spring I was gifted 1 1/4 yards of white denim from my brother's mother-in-law, Lillian, when she was cleaning out her stash. I first toyed with the idea of making shorts, but eventually decided that I would probably wear a white skirt more often than white shorts.
White denim
I used the same view D as last fall and the only minimal changes I made were to the lining for the front flaps and the buttons. When cutting, I put the pieces that fold over to be the linings for the front right and left edges on the selvedge. That way I didn't have to finish the inside edges.
Selvedge along the left side will the finished edge of flap
There are only five pattern pieces for the fabric and four for the interfacing so the cutting proceeded smoothly. My earlier time-saving strategy of employing the selvedge, a good idea, was balanced out when I managed to iron the interfacing on the wrong sides of the left and right waistband pieces, a not-so-good idea. Now on the inside of the skirt the interfacing shows on the band. It's the same white as the fabric though and only visible when I'm not wearing the skirt, so I didn't bother to recut new pieces. I wonder if that will hold up in the wash?
The buttons are from one of the sewing boxes that accompanied the treadle sewing machine Willie and Janyce delivered earlier in July. The machine originally belonged to Janyce's grandmother and has been passed along in the family for a few generations. I don't know how old these buttons are or when they joined the collection, but they were perfect for the skirt. The buttons needed a larger buttonhole than I have made before though, so I had to read the instruction manual for adjusting the buttonhole attachment on the Singer 201. After several trial runs I felt confident in maneuvering the buttonholer mid-buttonhole to create holes of a consistent size. Button placement took awhile as I did not use the template suggested in the pattern. I wanted to use all five buttons but not fasten the whole flap closed.
Placing and marking buttons
I'm sure there's a better way to do this, but here's what I came up with for reinforcing the back of the buttons. They're a bit heavy and I didn't want them to tear through the fabric. The layers of little white squares remind me of trying to cover a shaving nick with tissue. Fortunately, none of this is visible when the skirt is being worn.
Reinforcing the buttons
Lastly, I put a hook and eye on the inside of the waistband above the dart on the right. This will help keep the lower flap from hanging below the waistband and take some of the stress off the buttonholes.
Pictures were taken on a sunny day in the garden. When I went to look for a top to complete the outfit, I found this white t-shirt at the top of the pile. It's one that I made while while trying to get the perfect fitting t-shirt. After seeing pictures I think all white is a bit much, so I'll probably wear a shirt with some color for future outings.
All white is a great backdrop to showcase garden flowers
I like to see all the bees and butterflies that visit these coneflowers
Radiant petunias
I don't think I have to worry about this fabric being see-through, but I won't push my luck with dark colors of underwear. 
Checking on tomato plants
Kneeling close up
Even when sitting down, the five buttons keep this skirt from unwrapping.
Watch out for grass stains
Seriously, I am so pleased with these buttons.
The extra time spent measuring and remeasuring for placement paid off
Never get it right when setting the phone timer for a jump
And here are a few visitors I had in the garden. Take note, no one else is wearing all white.


Sunday, July 21, 2019

Beginner Bra Class at Bra-makers Supply

The Classic at Bra-makers Supply
Mom signed us up for a class with the Fairy Bra Mother, Beverly Johnson, back in May. Instead of taking our annual end-of-school vacation to go hiking, we decided to change it up a bit and take a 'working' vacation later in the summer. This time, we headed northeast across the border into Canada. Neither Mom nor I had ever been to Canada and this was the first time we used our new passports. The Beginner Bra-101 class was this past Monday and Tuesday, July 15-16, in Hamilton, Ontario. Mom and I drove up to Hamilton last Friday and had 2 days to be tourists before class started. 
On Saturday we went to Toronto. We visited The Workroom for a bit of shopping and then walked around that neighborhood. On our way back to the hotel we stopped and visited the Royal Botanic Gardens.
On Sunday morning we drove down to Niagara Falls. We listened to the roar of the falls, felt the mist, walked along the boardwalk, and then left before it got too crowded. We then headed up to Niagara by the Lake for lunch in the park and a walk around town. On the way back to Hamilton, we stopped at an apiary and picked up some local honey.

Perfectly sunny morning
We're all smiles
For class on Monday we arrived fifteen minutes early so that we could set up our machines- I brought one from home and mom rented one. There were seven women, including us, taking the class and it was fun to hear what brought everyone to this class. Mom and I were the only students not from Canada. One lady is currently living in China, but she grew up in Canada. 
My Bernina Nova 900
After introductions, Denise, our instructor explained how the class would proceed over the next two days. Then, Linda measured each one of us for our first bra.
Linda's notes after my fitting
Denise makes changes to the Classic bra pattern for me
Then it was time to start sewing. Denise would talk us through a couple steps and give examples, then we had time to sew at our own pace. Included in the bra kit was an instruction booklet and I found myself making notes in the margins based on what Denise modeled or explained during the class. Even though we were all starting with the same Classic pattern, we were all making different adjustments to fit our own bodies and I wanted to make sure I kept track of my particular changes.
My first bra cups completed, 3/8" center seam was a modification for me
Look at that pressing form, perfect for cups
There were different elastics for the neckline, straps, and rib cage so we had to be particular about which elastic was attached where.
Adding neckline elastic
Here's what the bra looked like at the end of the first day. I was pleased.
It's looking like a bra
Then I turned it over and started examining my work. Yikes, it was not as impressive on that side. Do you see how the channeling on the right does not mirror the placement of the channeling on the left? The right side was sewn in wrong so that was going to have to come out. On the left channel though, I had some sloppy stitching and the wire was not going to fit so I needed to take that out too. Lastly, when attaching the neckline elastic some of the fabric in the top of the right cup got caught and there was now about a 3/8"dart, therefore less fabric in that cup. Yes, that would need to come out too. I gave myself homework that night.

Right side channel upside down, left side channel too narrow
On the way back to the hotel that night we stopped at Ann's Fabric Shop. They had wools, knits, jerseys, linens, and upholstery fabric too, but there was such a vast collection of glitter and sequins that nearly everything was covered in sparkle.
We arrived at class by 9 am on Tuesday and I had a few minutes to resew everything I had spent 40 minutes taking out the night before.
Let's get those changes made
Then I was able to move on to finishing the bra straps, back clasps, putting in wires, and adding the bow. Because I had put the bar tack a bit low on the bridge end of the channel, Denise had to get out the bolt cutters and trim about 3/8" from the ends of my wires. Next time, I will raise the bar tack and the wires will fit without cutting. The kit came with a white bow, but Denise and Linda both suggested that I switch it out for lilac to match the thread in the bra. That was a good option.
By 11 am, my bra was finished and I had my second fitting. Linda and Denise made two small changes to the pattern itself, I will need to wear a 3/4" extender for the back clasp, and we decided that I should cut 12" shoulder straps next time. Overall, the fit on this first bra was very good!
With lilac bow and after second fitting, just need to trim the channel end
Here are two pictures of the bra on my dress form. The dress form is not exactly my size, so the bra looks a bit loose and the extension for the clasp is not needed.
Finished bra
Back view, still need to add extender to clasp
After finishing our first bras and before breaking for lunch, mom and I wandered over to the supply store next door and chose the fabric and fittings for our next bra. I wanted to practice the same construction process, so I chose to make the same bra again in a different color. After lunch we started working on the new bras. 
Second bra will be burgundy
Before packing up on Tuesday, mom and I visited the store next door again and picked out supplies for 3 more bras each. There were so many colors, findings, and laces from which to choose. It's going to be fun to get creative with future bras.

Denise also altered a Shelley pattern for me so that I could try one with a little push up support. I brought that pattern home to try at a later date.

The burgundy bra was a little over halfway finished by the end of class on Tuesday. I ended up finishing it on Friday morning at home. This time I didn't have to take out any errant stitches and I put the bar tack in the correct place so that the wires would fit without having to be trimmed.
Burgundy beauty
Got to get that clasp extender
So, now I have two new well-fitting bras and the skills and materials to make several more. I am so pleased that mom and I took this class. We always have a good time on our summer adventures and we both sew throughout the year, but this was the first time we combined the two activities and it was a success. Thanks for being the best travel companion and fellow sewist, Mom. I'm looking forward to many more trips and projects with you.

Wednesday, July 17, 2019

Strip Pieced Triangles Quilt

Colors radiating out from the center
The fabrics in this baby quilt are a mixture from my sisters' collections and my collection. Current and decades old fabrics were strip pieced into blocks and then cut into half-square triangles. I love the quirky mix of fabric patterns and colors. Random piecing is not something I give myself over to very easily, but I tried to let only the size of the fabric scrap dictate placement for each block.
Piecing on my Bernina 1230
So many fun fabrics
Cutting into squares and then again into triangles
Some blocks before being cut into triangles
One of two piles of scraps from which I was pulling pieces
I started with two large bags of scraps spread out on the floor and table near my sewing machine. At then end, I had a third pile. This one consisted of 'too small to use again' scraps. It was very difficult for me to relegate any scraps to this pile, but some pieces really were beyond rescuing.
Itty bitty pieces
Once all the half square triangle blocks were made, I played around with the layout. Chevrons, stars, diamonds, boxes, etc. were tried.
Chevrons, moving on
Another option, keep playing
The final layout is my favorite. It has a square in the center and then triangles expanding out in each direction.
Finished top
To baste the quilt, I laid out all the layers on the front porch. The backing is a chevron patterned flannel I had used in an earlier baby quilt. Stewie appreciated the extra quilt batting and settled in to supervise the basting progress.
At least he wasn't on the quilt
 For the quilting, I set up my Bernina 830 on the dining room table.  I used the walking foot and had plenty of table space on which to maneuver the quilt. My first attempt at zig-zagging in the middle square did not look good and I ended up picking all of those stitches out.
Messy middle got taken out
The quilting is concentric squares moving out from the middle. They are not evenly spaced and I really like the non-uniformity.

The binding was pieced from a combination of four different fabrics used elsewhere in the quilt.
You name a color, this quilt has it
Quilted squares of varying sizes
Chevrons camouflage some of the quilting on back
Quilt is ready for baby Piper who will join the Lewis family this August