Showing posts with label Simplicity. Show all posts

Friday, May 1, 2020

Bag Woven By Grandkids, Guest Post from Linda

Finished bag hanging from Necchi
Guest post by Courtney’s mother Linda

Children have an attraction to new and different tools, and big looms threaded with bright colors are a child magnet. Most of my looms are too big for a small person to handle. We made do sometimes with one child on one side of the loom throwing the shuttle to a sibling on the other side with me doing the treadling, but it was obvious to me that they needed a loom to fit. (It didn’t hurt that the little Schacht Wolf Pup was a loom I wanted anyway.)

Enter the four-shaft, six-treadle Wolf Pup. When this photo was taken, Oliver was six and Etta was four, and they could both manage to change the sheds and throw the shuttle themselves.

Etta and Oliver at the loom
When baby brother Finn was born, we decided to weave him a playmat. It would have to be three segments sewn together, because the width of the Wolf Pup is only around eighteen inches. I warped it with brightly colored 8/4 cotton and we used white cotton flake for the weft. Predictably, by the time the fabric was completely woven, Finn was walking and had no real need for a playmat. Cotton fabric is versatile—I thought it would make a useful tote bag. I have several bag patterns in my stash, this Simplicity one is from 1975.

Pattern Envelope
I sewed three segments together to make the body of the bag. Since the fabric was somewhat loosely woven, I interfaced it with an iron-on product.

Interfaced section on cutting table
The weave structure is a simple plain weave, but the irregularity of the cotton flake weft yarn combined with the shrinkage that occurs with cotton yarns when they are washed in hot water has yielded a lovely texture.
All the pieces cut
Most of the bag was sewn on my vintage Necchi BU Nova. Listening to that quiet and powerful motor is pure pleasure.
Green straps being sewn on the Necchi 
Here is the bag mostly constructed, just waiting for the side seams.

Constructed bag lying flat
I switched machines to sew the side seams. I wanted the stripes to match at the sides, and the walking foot on my Bernina 1130 keeps the top and bottom layers well matched.

Side seam sewn on Bernina 1130
The bag is lined with a pale yellow cotton, courtesy of my quilting stash. I don’t know what it will store—groceries, toys, beach items—but I hope it will be an incentive for more weaving!

Perfect pattern matching on the pocket

Sunday, July 28, 2019

White Denim Wrap Skirt

The skirt and the butternut squash plant look great
My first go-around with this Simplicity 8699 pattern was last fall. I used a lightweight denim and have liked almost everything about how the skirt has worn this summer. The only quibble I had with the pattern is that there were no pockets. This is understandable though, given that it is a wrap skirt, and I don't think that has actually deterred me from wearing it regularly. Earlier this spring I was gifted 1 1/4 yards of white denim from my brother's mother-in-law, Lillian, when she was cleaning out her stash. I first toyed with the idea of making shorts, but eventually decided that I would probably wear a white skirt more often than white shorts.
White denim
I used the same view D as last fall and the only minimal changes I made were to the lining for the front flaps and the buttons. When cutting, I put the pieces that fold over to be the linings for the front right and left edges on the selvedge. That way I didn't have to finish the inside edges.
Selvedge along the left side will the finished edge of flap
There are only five pattern pieces for the fabric and four for the interfacing so the cutting proceeded smoothly. My earlier time-saving strategy of employing the selvedge, a good idea, was balanced out when I managed to iron the interfacing on the wrong sides of the left and right waistband pieces, a not-so-good idea. Now on the inside of the skirt the interfacing shows on the band. It's the same white as the fabric though and only visible when I'm not wearing the skirt, so I didn't bother to recut new pieces. I wonder if that will hold up in the wash?
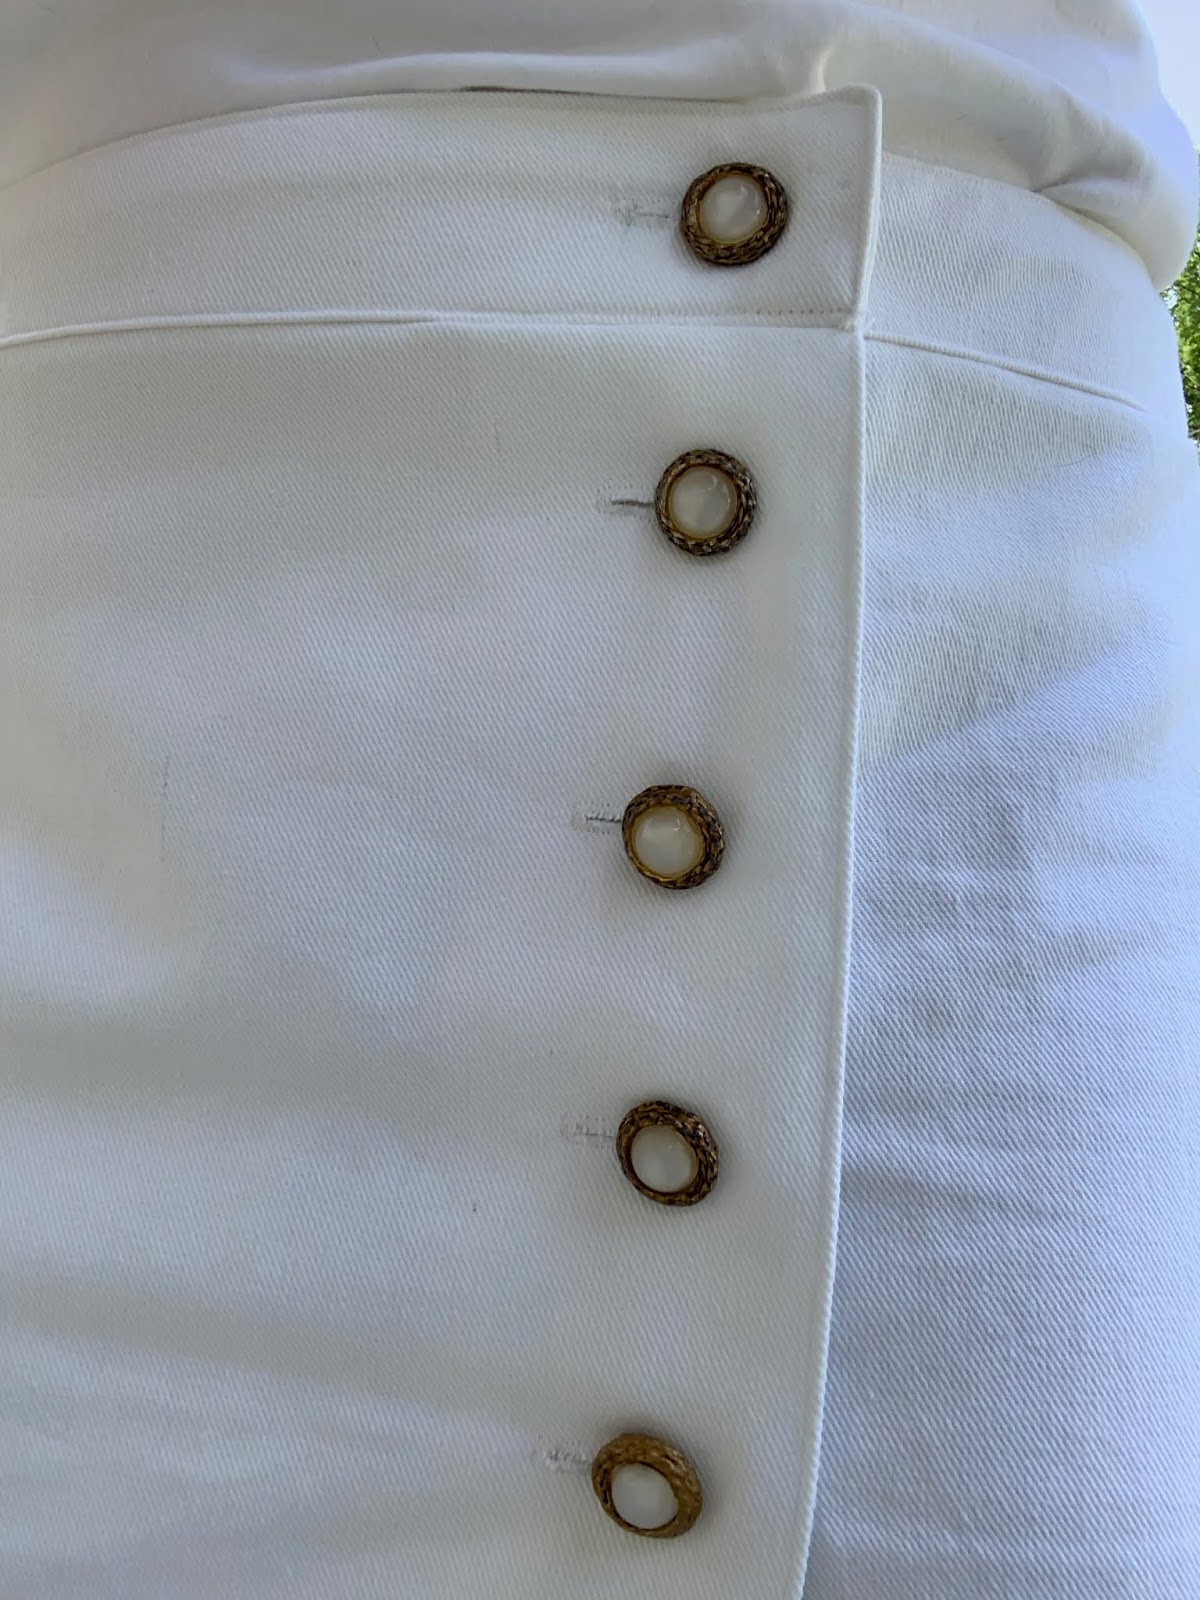
The buttons are from one of the sewing boxes that accompanied the treadle sewing machine Willie and Janyce delivered earlier in July. The machine originally belonged to Janyce's grandmother and has been passed along in the family for a few generations. I don't know how old these buttons are or when they joined the collection, but they were perfect for the skirt. The buttons needed a larger buttonhole than I have made before though, so I had to read the instruction manual for adjusting the buttonhole attachment on the Singer 201. After several trial runs I felt confident in maneuvering the buttonholer mid-buttonhole to create holes of a consistent size. Button placement took awhile as I did not use the template suggested in the pattern. I wanted to use all five buttons but not fasten the whole flap closed.
Placing and marking buttons
I'm sure there's a better way to do this, but here's what I came up with for reinforcing the back of the buttons. They're a bit heavy and I didn't want them to tear through the fabric. The layers of little white squares remind me of trying to cover a shaving nick with tissue. Fortunately, none of this is visible when the skirt is being worn.
Reinforcing the buttons
Lastly, I put a hook and eye on the inside of the waistband above the dart on the right. This will help keep the lower flap from hanging below the waistband and take some of the stress off the buttonholes.
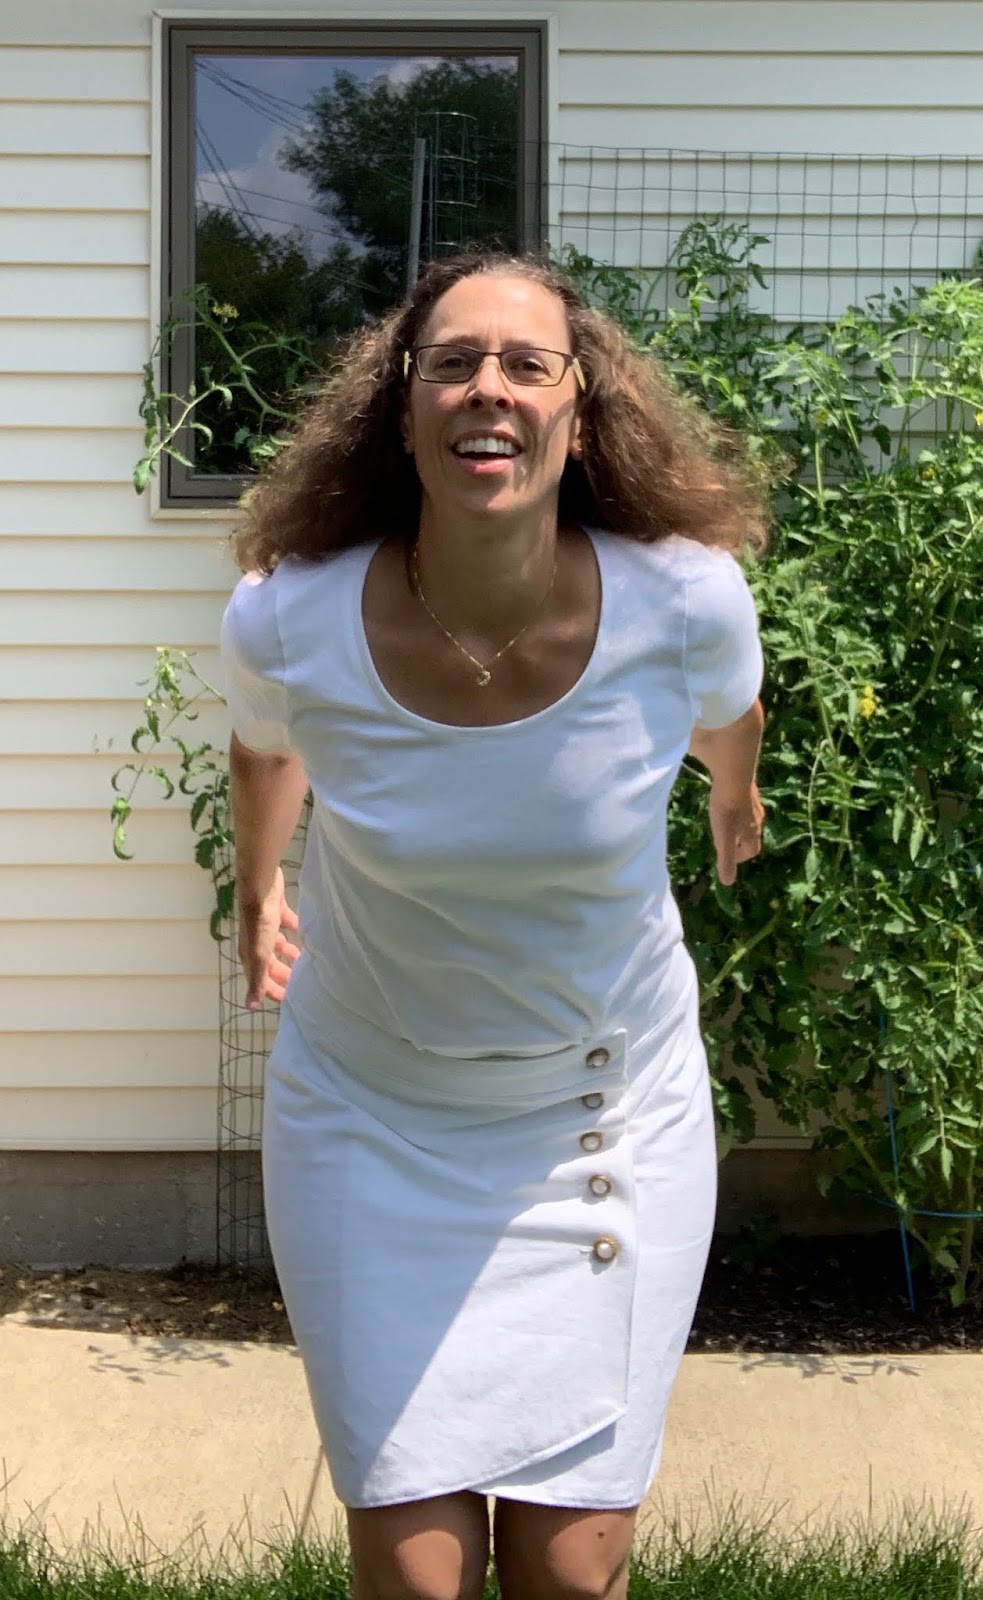
Pictures were taken on a sunny day in the garden. When I went to look for a top to complete the outfit, I found this white t-shirt at the top of the pile. It's one that I made while while trying to get the perfect fitting t-shirt. After seeing pictures I think all white is a bit much, so I'll probably wear a shirt with some color for future outings.
All white is a great backdrop to showcase garden flowers
I like to see all the bees and butterflies that visit these coneflowers
Radiant petunias
I don't think I have to worry about this fabric being see-through, but I won't push my luck with dark colors of underwear. 
Checking on tomato plants
Kneeling close up
Even when sitting down, the five buttons keep this skirt from unwrapping.
Watch out for grass stains
Seriously, I am so pleased with these buttons.
The extra time spent measuring and remeasuring for placement paid off
Never get it right when setting the phone timer for a jump
And here are a few visitors I had in the garden. Take note, no one else is wearing all white.


Saturday, September 8, 2018

Denim Skirt, Simplicity 8699

Denim wrap skirt
The fabric is a lightweight denim I picked up when I was visiting City Sewing Room in St. Louis this summer. The pattern for this wrap skirt, Simplicity 8699 view D, was purchased at Joann's. I was looking for a skirt that could be created in a variety of lengths using a range of fabrics. A wrap skirt would lend itself to fitting over both my ample hips and fitted waist and button placement for the closures could be repositioned as needed. This one looked promising as far as fit. 
For some reason, I didn't take a single picture of the skirt during its construction. Apparently, I was completely absorbed in the process. I traced a size 20 and cut out the pattern last weekend and then spent today sewing the skirt together. Except for when I sewed the right and left yoke pieces on backwards, I was able to follow the directions without problems. That error was completely mine, and it was easily corrected when I figured out what I had done. The last couple steps were to sew on the buttons and the snap closures. For the buttons I wanted to use something out of my vintage collection.
Auditioning buttons
I think I would have been happy with any one of these options, but I decided to go with the smaller brown ones shown on the left. Hopefully, this will make the skirt more likely to work with a variety of tops.
Buttons chosen
The buttonholes were done on my Bernina 1230 using the #3 foot. I don't think they're the best buttonholes I have ever made, but they will work very well and I will continue to develop my skills in this area. I may have modified the button placement as I just tried on the skirt several times to see where they felt most comfortable. I didn't go back to see how similar the final placement was to the pattern, but I would bet its fairly close.
Buttonholes and buttons
One hidden snap on waistband
The inside of the skirt is not lined. Depending on what fabric I use next time I will probably need to add a lining, but for now it works perfectly fine.
Inside of skirt
Today is a cloudy, overcast day that doesn't lend itself to outdoor pictures, but I went ahead and did the best I could.
Front view
I didn't make any changes to the finished length and I like that it hits right above my knees.
I love the curve on the hemline
Back view, maybe could have used a bit more ironing
Yoke finished well
Pairs well with a Lark tee
Very comfy
I will definitely use this pattern again and try out the longer version as some point. It's the tail end of skirt season as we head into fall, but I'll be ready for warmer weather next spring.


Monday, August 13, 2018

Simplicity 1692, Flowered Shirt

The fabric was picked up for free about a mile from my house.  Someone had posted online that they were cleaning out and had a couple bags of fabric remnants that anyone could claim. There were a lot of upholstery remnants in the bags, but I did find a couple pieces that I could use for garments. I wish everyone would call me when they had fabric they wanted to pass along!
I held off cutting into this piece for awhile because I knew I couldn't get more if I made an error
The pattern, Simplicity 1692, is a vintage 1940's blouse that I picked up at Joann's. It has long and short sleeve options and high and scoop neck options. I chose to cut view B, jewel neck and short sleeves, in size 14. There were three muslins for this shirt before I cut into the fabric. Among the changes I made in the muslin process were to add 1.5" to the bottom and move the front darts down, add 1/2" to the side seams then add another 1" to the length and 1" to the hips.
Muslins 1 and 2 from an old sheet
After the third muslin, I was ready to cut into the fashion fabric.
Bright colors
Having partially constructed three shirts already, this fourth one went together quickly. The back is fastened with a button.
Facing for back opening, button will be added to top
The finished shirt as not what I had planned. First, I had to abandon the sleeves as they wouldn't go around my arm and there was not enough fabric left to recut them. The armscyes were a bit small as well, so I trimmed about 1/4" off and then turned under about a 1/4" to finish them. I don't mind the sleeveless look though, it is nice for summer.
There is too much fabric across the chest area for me.  
 I chose not to put in shoulder pads, but there wasn't room and I don't think that I miss them. The button on the back was from the extra button box.
Back with button closure
I was happy with the overall length of the shirt. There was too much fabric around the bust though, it doesn't give a fitted look. And the armscyes were still too small. It would improve arm mobility if the openings were a little larger.
The size zipper looks good and even matches one of the blues in the fabric


The gathers at the neck look great, but the neckline is a bit tight. If I could take some of that extra fabric in the bust area, open the armscyes and neckline a bit, and take in the side seams maybe I'd have a good fit?

I do think I'd like to try this pattern again with a few more adjustments.  Unfortunately, I don't think I will even be able to use this shirt as a wearable muslin. That means I don't get to keep this fabric in my collection. I'm going to miss the bright colors.

Update: I wasn't ready to let this one go. It hung in my closet for several weeks before I decided to give it one last go on the fitting. There was way too much fabric in the front and I didn't want to take out the side zipper, so I played around with other ways of eliminating extra fabric. I ended up taking in about 2" in the middle above the waist and 1" below the waist. Now this shirt will come out of my closet to be worn regularly.

Here is a much better fit

Keyhole opening in back

Front pleat is almost lost in the flower pattern

The neckline is still a bit high, but I do like the gathers

Keyhole with button

Red like the blooming hibiscus
Pattern washed out a bit in the sun
I am very pleased with how this shirt turned out in the end. The gift of free fabric pushed me to try something new and I relished the challenge. If you want to get rid of some fabric, send it my way-- I'm curious to see what will inspire my next project.  :)