Sunday, May 26, 2019

Chartreuse Wall Hanging


 It started out with a chartreuse and lime green color palette. Then, it expanded to some blue greens and a few yellow greens, but there are only a couple spots of errant pink or orange. The fabrics are a mix of a couple jelly rolls, some quarter yard pieces, and some flour sack scraps. There is a good mix of old and new all playing nicely together.
Jelly rolls, scraps, fat quarters
There were even a few pieces salvaged from the backing to my lime-teal quilt from last year. Stewie gave that fabric the old nap test and when it passed he approved the polka-dot fabric addition for this quilt.
Fabric must be comfy for napping
Cutting and laying out blocks took a couple days. Yes, the pieces are small, but you need so many of them even for a small quilt.
I ended up creating five different types of blocks 
Forty-nine blocks in total
Basting this quilt was a quick task. It was small enough to fit on the dining room table and I just rotated sitting in chairs around the table until the basting was completed on all sides.
Found a piece of scrap batting
The quilting pattern was decided at a session of Loose Ends. There are five types of blocks in this quilt and each one got its own quilting design. The last one to be chosen was the pattern for the the solid blocks and those ended being the only circles in the quilt. All of the quilted straight lines and diamonds were free handed, but the circles were traced from the bottom of a cup.
Lines, diamonds, and circles - oh my
The quilt was in my 12"x 12'' Q-snap frame for about a week and I worked on it in the evenings before bed. The binding was made and sewn on using my Viking 21. This teal beauty fit right into the color scheme of the quilt.
Binding made with scraps
Sewing binding on to quilt
Binding on, edges trimmed
The binding was finished by hand in one evening. Here is a picture of the front and the back of the quilt before it got washed.
The circles do jump out to the viewer
The random pattern on the back is exactly what I wanted
After a wash and then laying flat to dry, the quilt was ready to photograph.
Shadows and quilting add plenty of texture
Not in direct sun
Lilacs ready to bloom


Sunday, May 19, 2019

Shirt of Many Colors

This shirt does not blend into the background
This shirt is a TNT pattern, Vogue 1509. I continue to make slight changes to the neckline, but the fit is good and I don't mess around with that. The fabric was on the sale shelves at Joann's and is a quilting cotton. There are a whole range of bright colors in here and maybe not something I'd pick for a quilt, but definitely promising for a shirt.
Maybe I'm trying to channel spring or summer?
The fabric was pre-washed and then ironed one day and then cut the next afternoon.

I have made the front all one piece instead of the three it was originally
Skin is not visible through the fabric and there is no lining to cut. There is interfacing on the collar. On my fifth or sixth time putting this pattern together, I noticed that my skills in a few areas have improved. The hem is more even and polished looking, the tabs have a better shape, and the collar lays very nicely without any puckering.
Hem
Sleeve tab 
Collar top-stitched in black
The shirt was cut out and started one weekend and then finished the next. This time I opted for snaps on the sleeve tabs when I didn't have coordinating buttons in my stash. The black snaps are well camouflaged by the pattern on the sleeve. The front opening did not get any of the buttons or buttonholes called for in the pattern. Instead, it is sewn closed about halfway down and the top is left to hang loose. This may require ironing each time the shirt is washed, or I might learn to like the relaxed drape of the neckline.
Rolled up sleeves may need a lining
The finished shirt fits well and will feature regularly in my spring wardrobe.

Good length


Saturday, May 11, 2019

Butterick 5526, Tablecloth Shirt

Starting with a table cloth
This fabric came to me in the form of a table cloth. It was picked up at either an estate sale, garage sale, or flea market or a very budget friendly price. From the start I knew it would be a refashioning project. In August of 2018 I started to make it into a circle skirt. I wasn't working from a pattern though and when I got to the waistband it was a bit overwhelming to try to get a good fit. The entire project was set aside until March 2019 when I pulled this fabric back out and decided to recut the pieces into a shirt.
Beginning the skirt to shirt conversion
There wasn't much extra fabric and I could not be very particular about layout and pattern matching. I did manage to use the already sewn hem for the bottom of the front and back panels, and it looks like there is an extra panel on the sides under the arms, but that was just a seam already made in the skirt.
100% cotton
Very tight fit when laying out the pieces
It was the second time I had sewn up this pattern and it went a bit quicker this time. I practiced using french seams on the sides, shoulders, and sleeves, and I didn't have to do my own hem. The shirt was sewn on my Bernina 1230 and top-stitched on the Bernina 717.  When I stood back to admire the shirt on the dress form, I noticed that the patterns showing on the right and left front openings were very different. On one, I had managed to get mostly the white background and the other had more of the green and blue. Even though the flower patterns didn't line up exactly and it meant that I would have to button my shirt from the wrong side, I chose to keep the more colorful band on the top.
Colorful button band on top
Next, I came to the conclusion that I really do need to expand my button collection. There have been a couple projects in a row now where progress has come to a standstill while I source buttons. This time I checked Joann and then Vogue. There was nothing at Joann, but Vogue had a couple of options. I tried out 4 different types and settled on the ones in the top of the picture. I took the last 13 buttons they had and paid less for them than I did for the fabric. This refashion came in at just under $5 total. That is a win in my book.
Checking size, color, price
The buttonholes were done on the Singer 201 with the attachment. Since I added length to the pattern, the suggested button placements one the front opening had to be adjusted. I didn't put one up at the collar and six were spaced out nicely on the rest of the band.
Button placement
Buttonhole before trimming
It took two evening to get the buttonholes made and trimmed and the buttons sewn on. Every time I sat down to work, I ended up with a fur baby in my lap. I could only access a few inches of my project at a given time.
Stewie claimed the lap this time
I'm going to blame cat distractions for my sleeve cuff errors as well. Of course, I didn't notice until both buttonholes were completed and the buttons were sewn on that they both overlap going forwards instead of backwards. I made this same mistake before on a shirt a couple years ago, but I didn't change it then and I'm not going to now.  I know I can live with this imperfection. 
Backwards opening sleeve cuff
The collar looks fairly balanced with the fabric pattern and two-thirds of the back is fabric matched.  The panel pattern on the right is a bit off, but at least there was enough fabric to make a panel
No button at very top, I'd never button it anyway
Panel on right side is doing its own thing
Pictures from the neighbor's back yard. Their crab apple tree will be blooming soon.


Sunday, May 5, 2019

Butterick 5526- Brick Shirt

Sitting in the garden
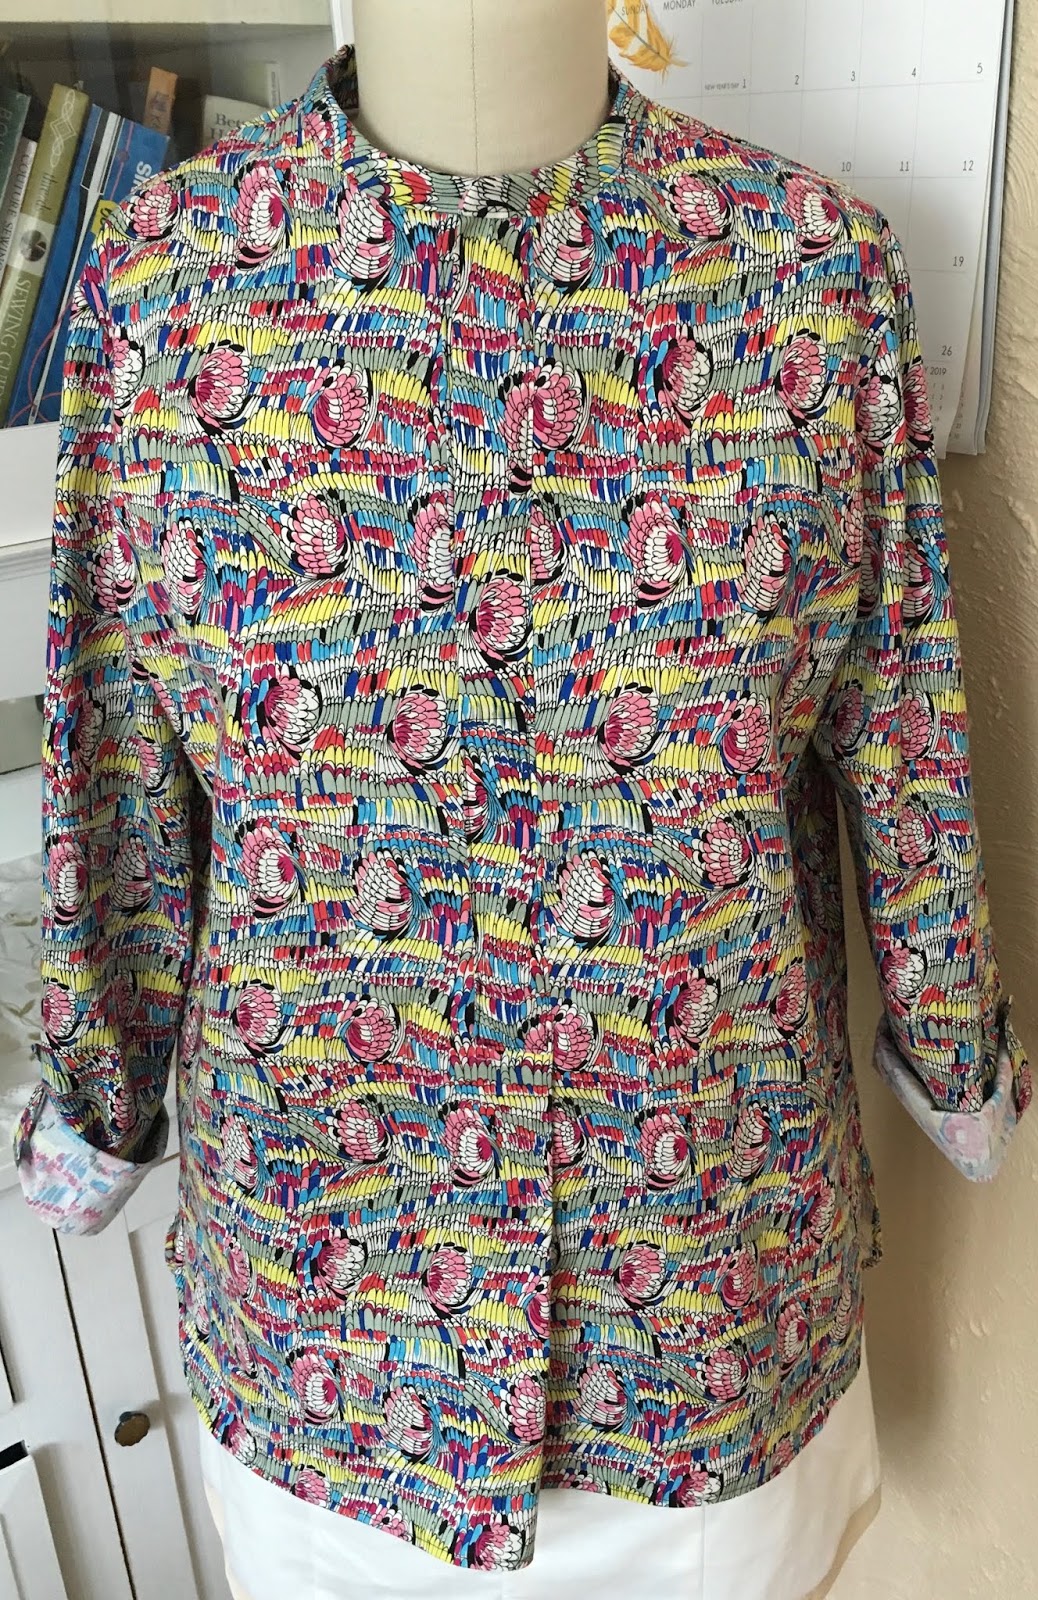
Here is another Butterick 5526. This time I tried view A with short sleeves. The princess seams have been replaced with two front pockets.

The fabric is quilting cotton from the sale rack at Joann. Seeing it reminded me of a video game from the 80's called Arkanoid or Breakout. The goal in the game was to break up stacks of colored bricks by bouncing a ball off your moving paddle. I didn't have a gaming system, but I remember playing this game at my friend Liz's lake house.
80's video game
Fabric
The only change I made to this pattern was to add length to the torso. I used the length of view C when cutting out the pattern. Construction of the shirt was similar to one I had made recently and since there were no princess seams it went together a bit quicker.
Pocket with top-stitching
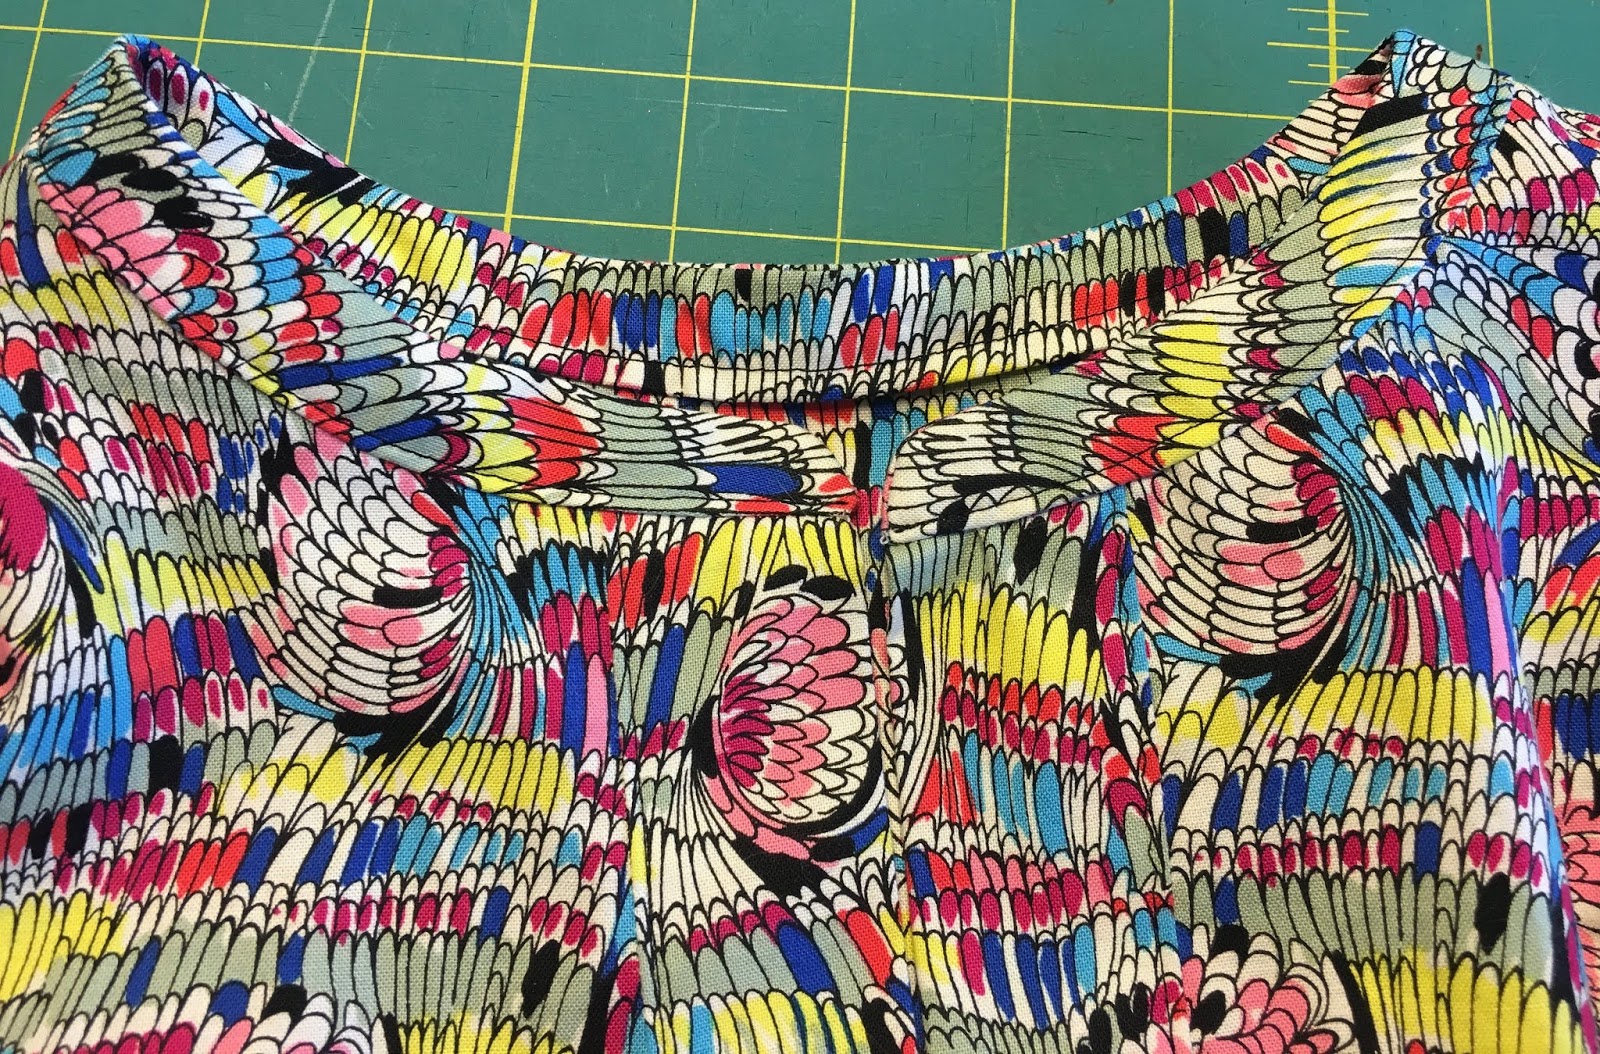
The collar was sewn together and then top-stitched with green thread. All of the top-stitching for this shirt was done on the Bernina 717.
Collar ready to be added to shirt
Collar stand
The collar stand on the back of the shirt has the brick pattern running vertically. I don't think anyone will ever see this as the shirt will be worn with the collar folded down, but I like knowing that little detail is there.
All seams and the hem were done on the Bernina 1230. This fabric did not try to slide around very much, but I err on the side of caution and often find myself using the walking foot.
Hem
After hemming, I put the shirt on the dress form to check fit. To me, the pockets looked a bit high, but I opted not to move them. The next time I make this shirt, I think I'll place them a bit lower.
Ready for buttons
The buttons came from Vogue fabrics. I had trouble finding ones to match the green top-stitching. These were a bit small in size, but they were the right green and there were enough buttons to complete the project that evening.
Auditioning buttons
Buttonholes again completed on the Singer 201 with attachment. I decided to go with the white thread as the buttonholes done in green seemed to overpower the actual buttons.
Checking size
I did not put a button on the collar band. I know that I have never worn a shirt buttoned up all the way, so starting below the collar makes more sense for me.
Not buttoned to the very top
I had enough buttons to add one on each pocket
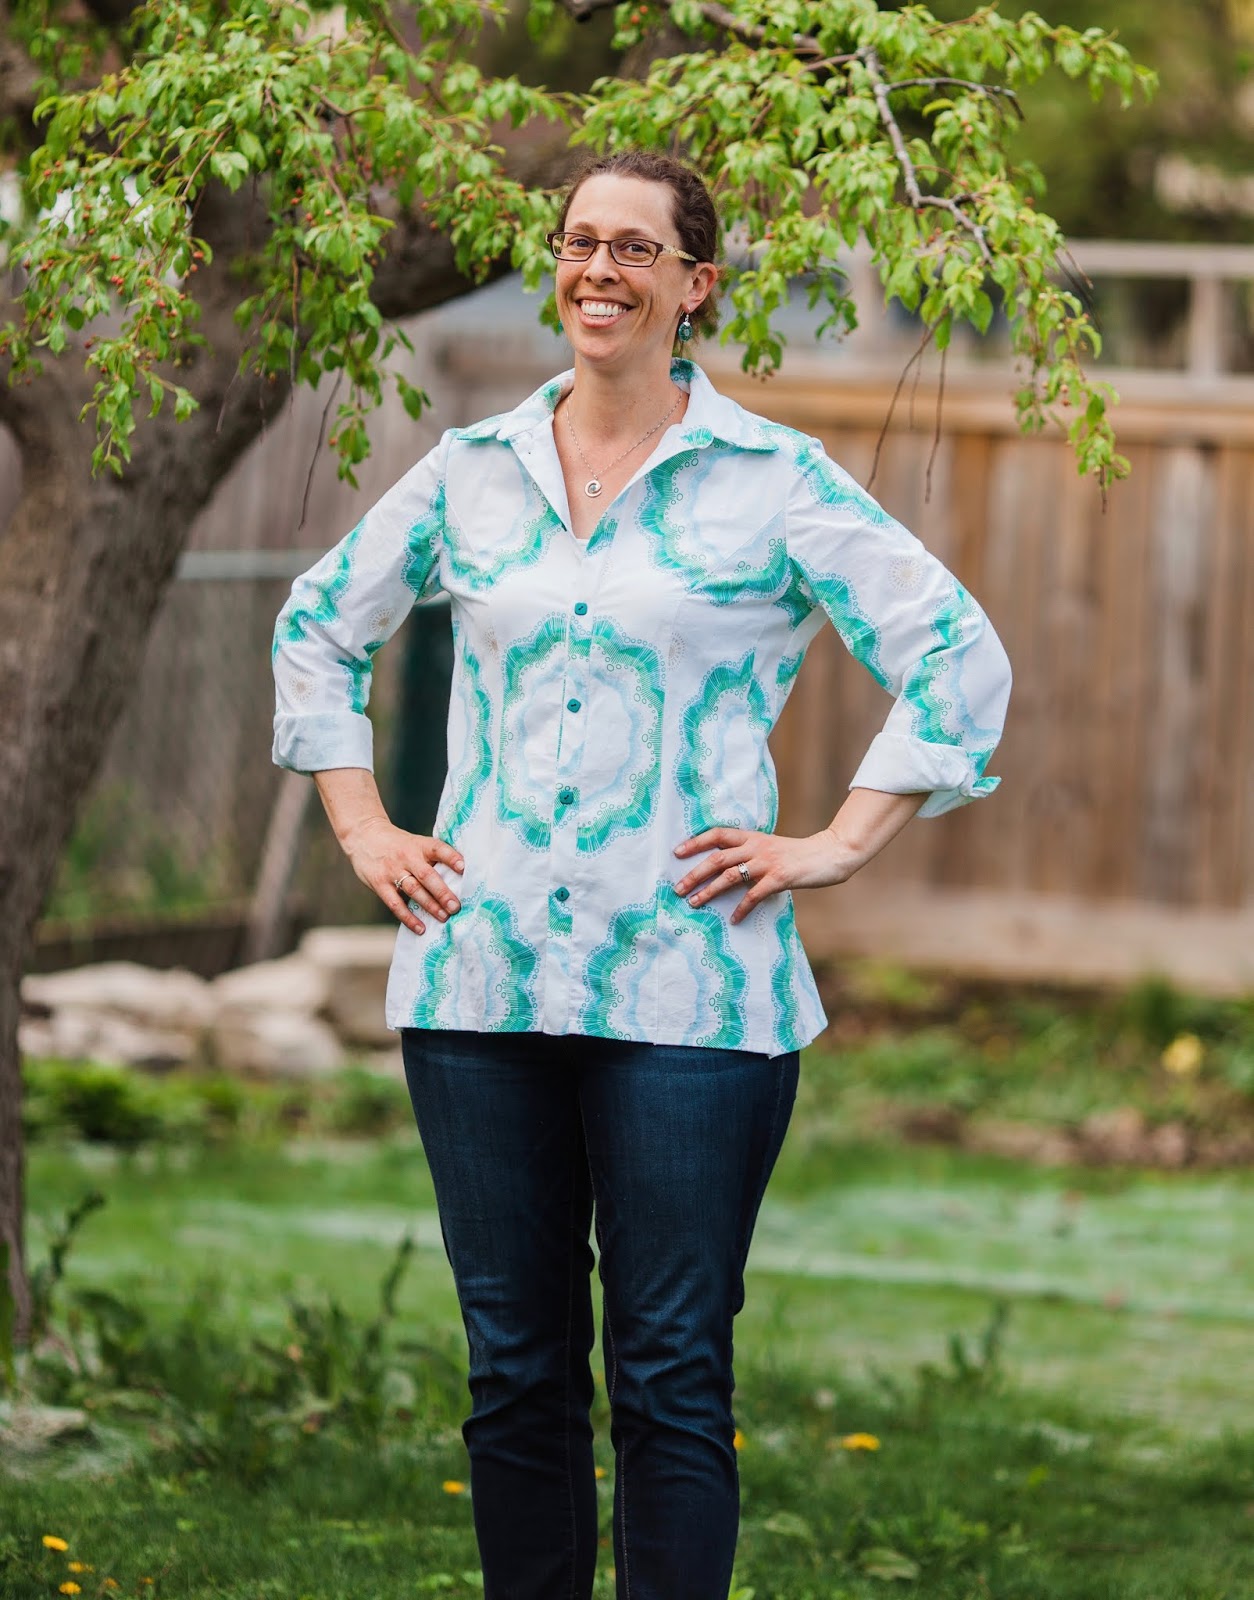
Here is the finished shirt. Today we finally got a warm and dry spring day, so all pictures could be taken outside.
Trees are in bloom
Good finished length
Fits well across the shoulders

I am very pleased with how this pattern turned out and I am already thinking about ways to change it slightly for other fabrics and styles.