Monday, July 31, 2017

Orange Quilt

The fabrics are leftover from a quilt I made for our bed a few years ago. They are all bright orange and yellow with some red mixed in.  The pattern was easy to cut out and it pieced together quickly.  
It would end up in an overall square shape

Batting and backing were added while sitting on the living room floor
The backing was a piece of fleece that had a white and gray chevron pattern.  It would make a very soft baby quilt should it get called into action.  I chose to do the quilting by machine in a variety of concentric triangle shapes.  The triangles are of varying sizes and types and layers between adjacent triangles are varying thicknesses.
Close-up view of fabrics and one triangle drawn on
Most of the quilting was done indoors on my Bernina 801 Sport, but there was one day at the end of the project were I brought an extension cord out to the back patio and completed the last few triangles overlooking the garden.  I could look up at anytime and see birds, butterflies, chipmunks, and flowers. I should sew out there more often.
Outside with a view
In the shade and loving the summer heat
Quilting finished
When I look at the back of the quilt, I'm not completely satisfied with the quilting.  Some of the stitches seem a bit loose.  I don't think the 801 liked working with the fleece backing and it didn't always hold the tension consistent. This quilt is not going to fall apart, but I would definitely want to try something different, maybe a walking foot, if I do another fleece backed quilt. The binding was made from more scraps.  Some of the pieces were getting pretty small, but there was still a good variety of fabrics. The binding was machine sewn on the front and then hand-sewn on the back. After getting washed and then hanging dry in the sun, the quilt radiates oranges, golds, and some reds.  I like how the quilting turned out, there are triangles and parts of triangles facing nearly every direction.  This was a good project to finish in July, the colors are very summery.
Finished quilt

Closeup of triangle quilting

Hanging above the climbing baby butternut squash


Tuesday, July 25, 2017

Chartreuse and Turquoise Shirt Complete


Bright colors and bold pattern
The last two days I worked on my shirt in the morning. Yesterday I started with the sleeve tabs. They were supposed to be a little wider and have a triangle on the end instead of just a slant--I'll have to read the directions more closely next time.
Tabs
Tabs with buttonholes and corresponding buttons
Next, I put the collar together and attached it to the shirt. It is edgestitched along the top and bottom.
Collar
This morning I put the tabs on the sleeves, set in the sleeves, hemmed them, and then added the buttons. Since the shirt is not lined, rolled sleeves reveal the backside of the fabric.  It's definitely a more casual look and I might consider lining the next shirt-maybe in a contrasting fabric?
Finished sleeve rolled up and secured with tab
The shirt was finished up today before lunch. It's very sunny outside, so taking pictures was a bit challenging. I tried to use the garden as background, but the lighting was difficult.  Here are a few shots that turned out well.
Back view
I didn't add any length to the original pattern and I like the finished back of this shirt. The pattern is also pretty well centered.
Side view
The tabs on the three-quarter length sleeves are a nice detail.  I don't think I'd ever wear the sleeves not rolled up.
Front view
I spent quite a bit of time trying to get the four hidden buttons under the front placket in the right place so that the placket would lay flat.  It looks like time well spent. In the original pattern there were pocket flaps under the front yoke, but I left them out figuring they'd get lost in the loud pattern anyway.

Ok, this last picture is definitely washed out, but it does show that the shirt works well for jumping in the garden.  That's another point in its favor, right?
I do plan to make this pattern again, but maybe not right away. What's next in the sewing project queue?


Sunday, July 23, 2017

Shirt Making Skills

Calling out to be a shirt
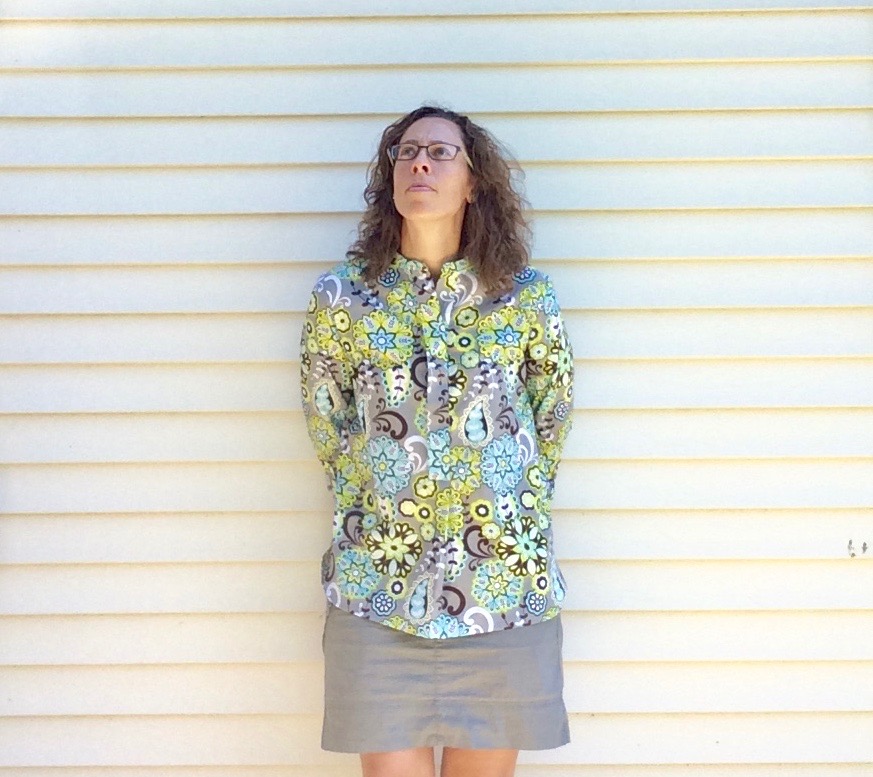
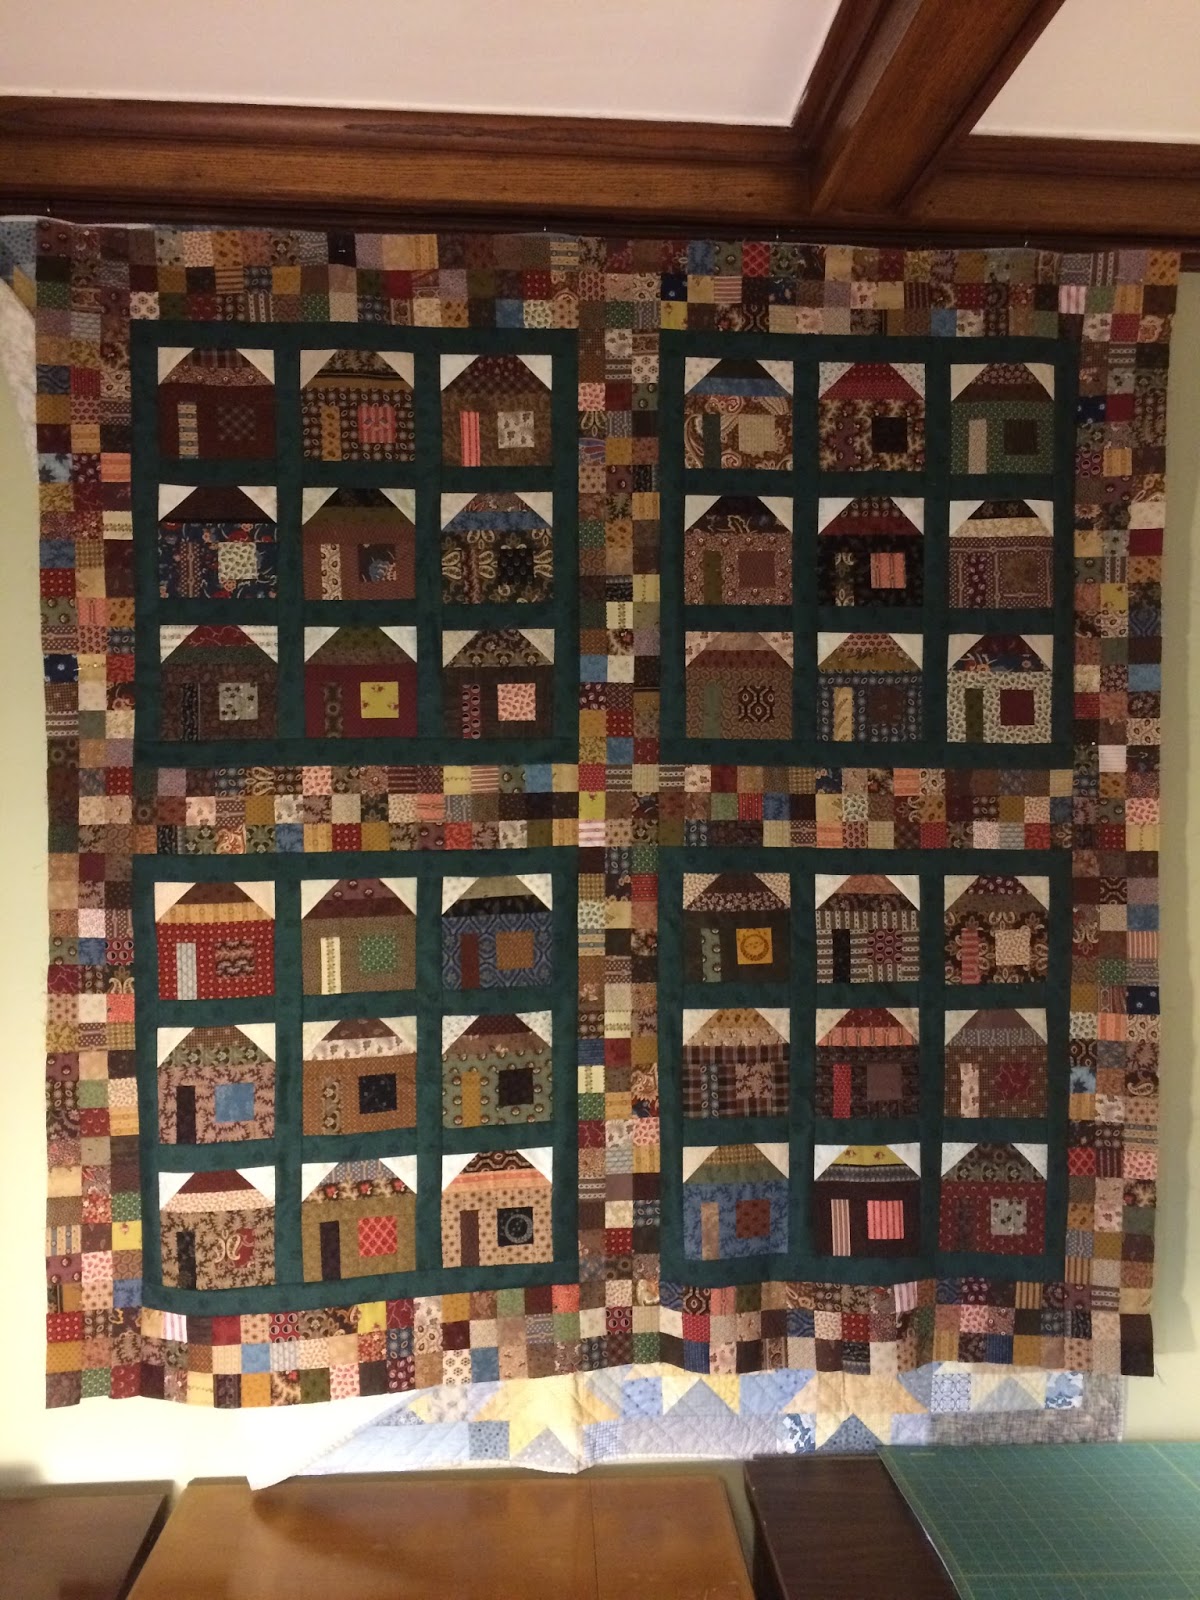
One of my goals for this summer was to spend more time sewing. Specifically, I wanted to build my skill set in sewing clothes. The first few weeks of summer flew by and I wasn't really able to focus much time on sewing until the last two weeks. Since then, I have completed a bodice sloper, finished piecing a wall quilt, and basted a miniature quilt. I find myself wanting to do something at the sewing machine each day. The most recent project, and the one I am still working on, is a shirt. The pattern is Vogue 1509 and I used some cotton fabric that my friend Jenny gave me a few months ago. 
Before cutting out this pattern, I matched up the pieces with the sloper bodice patterns that I had made to see how closely the pattern would fit me. I decided to cut out between size 14 and 16, so I guess it's a self-made size 15? Since the pattern pieces were larger than my sloper at all parts, I knew it would not be skin tight and it was long enough to come below the top of my jeans. One reason for selecting this pattern was that it had sleeves. The bodice sloper I made doesn't have sleeves, so I wanted to see how those would fit in the final pattern.
In putting this shirt together, I have already learned several new-to-me skills and had some practice with others that I hadn't used in awhile.
The first skill involved switching out the foot.  I did some edgestitching on the front placket.
Foot #5 for edgestitching
Front placket edgestitched
Next, I made buttonholes for the first time on my Bernina 1230. I started by just trying to guess how to set up for a buttonhole, you can probably guess how well this worked out.  The first time through it only sewed three sides of the buttonhole. It was time to go back to the instruction manual.  Careful reading revealed that one needs foot #3A instead of #3 and they look very different.
Foot #3A trying out various sized buttonholes
Fortunately, that one was in my accessories box and I quickly made the change. I also changed the bobbin threading so that it went through the little arm hole. After that the buttonholes came out clean and I could make them in various sizes and then copy a selected size multiple times.
Four finished buttonholes on the shirt

Hemming was another skill I practiced today. The front and back of this shirt have flat hemlines, but the sides curve up to meet at the side seam. First, I stitched 1/2" from the edge and then folded just over the stitch line and pressed.
stitched 1/2" from the edge and turned over
The next step was to trim about 1/8" from the stitch line.
Trimming
Then I folded the seam over 1/4 in" and stitched.  As you can see, things got a little out of line around the curves, but overall I'm happy with my first try.
Turned under and stitched
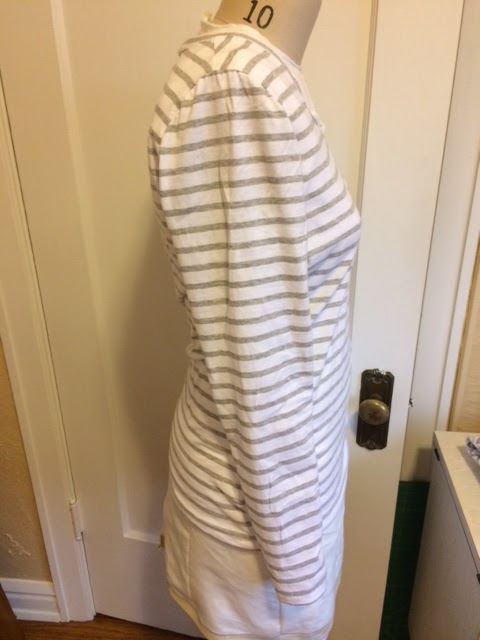
The back of this shirt has is gathered below the yoke. I hadn't done any gathering in a long time, so mom walked me through that process again.  Two basting lines, one other either side of the seam line, and then I pulled the bobbin threads to gather the fabric. The yoke was pinned to the back of the shirt and the gather was spaced between two markers.
Gather between red circles
The finished gather looks pretty well centered on the fabric pattern.
Back gather below yoke
At this point, I needed a break and a sweet treat.  Flourless chocolate cake with cream made a delightful snack. That's real brain food, right?


The last new skill I learned today was how to finish a french seam.  The sides of my shirt are finished in french seams and I like how they turned out. Here are a few pics of the shirt on my dress form at the end of the day. I'm still loving the fabric and it's starting to look like a real shirt.  Next up, sleeves and a collar. Maybe I'll get to continue working tomorrow?
Front view: the buttons are hidden under the front packet
French sides seams
Back view


Saturday, July 22, 2017

House Quilt


This quilt started out as a way to use up some scraps. Originally, I was only cutting 2" squares and I was planning for some type of a postage stamp quilt. For a few months I would cut or sew squares in small pockets of time, maybe 15 minutes before making dinner or half hour before bed. I ended up with plenty of squares, but I hadn't made much of a dent in the fabric stash and I couldn't decide on a postage stamp layout to use so the project got revised. I found a house block that would work well with assorted scrap fabrics and I began making several houses. The pattern I chose for the house blocks was from a free tutorial on Craftsy.

6 houses pre-construction

Houses needing finished roofs
After making about 15 houses, I still didn't have an overall vision for the quilt. I kept adding to the pile of pieced blocks, but there wasn't an end goal in sight. Then, a couple months ago, I laid out all the squares and house blocks that were finished and finally chose an overall design. I realized I had enough squares at that point, but I wanted 21 more house blocks. Those came along within a few weeks. Another layout shows different colors for sashing that I was considering.

Trying out sashing colors: green in upper right, brown in lower right
The houses did not stand out enough against the lighter sashing, so I went with the dark green. 
Outlined in green
This week I wanted to try out my Singer 201-2 that had been recently cleaned and rewired. The quilt squares and house blocks that had been stuffed into drawers were calling out to be sewn together. One day, when T was at work, I moved all of the dining room furniture and spread out the quilt pieces on the floor. It took a couple hours to get the entire top together and I am very pleased with how it turned out. My 201 was a joy to sew on. She is so accurate, quiet, and fast. I also switched out her lightbulb for a new LED bulb and I like the cooler light that it gives off.

Right now, I don't have space or time to baste and quilt this top.  I also need to think awhile on how to quilt it.  There are a lot of small pieces and seams here and I want the houses to stand out with the squares almost like a colorful cobblestone street in the background.  Currently, the quilt is hanging in the dining room (T walked past it for a whole day before I finally pointed out it was new).  I just pinned it right over the blue and yellow start quilt that was already hanging there. Hopefully, ideas for how to quilt this will start flowing.
Finished top


Friday, July 14, 2017

Class with Ray White

This past week I made the 6 hour trip down to Belleview, Missouri to take my fourth sewing machine repair course from Ray White. I have looked forward to every one of these classes and I always learn so much from whatever projects I get to work on over the three days. I also look forward to seeing what machines/projects the other students in the class bring with them because everyone is willing to talk to and learn from each other. As this was my third advanced level class, I felt more confident predicting how long each of my projects would take and how many machines I should take with me. This time I packed 7 machines into the car and I was able to finish up 6 of the 7 during my stay.  The last project turned out to be more involved than I anticipated, but I will get it finished up here at home in the next few days.

The projects that I took for myself included: a Bernina Nova that needed a foot control/power cord conversion kit install (Ray sells the kit and I was glad he'd be there to supervise my installation), a Bernina 830 that had a broken nose cover plate, a Simplicity Easylock serger that did not make a stitch and needed to be re-timed, a Singer 301 that needed new wiring and a tuneup, a Bernina 1130 and 1230 that had both been purchased recently and had not been tried out yet (hoping for minimal work needed), and a Singer 201-2 that ended up needing rewiring, motor-cleaning, and some restoration.

Bernina Nova
I started the first day with the conversion kit install on the Bernina Nova.  One of my customers had purchased the kit online from Ray's website and then I brought the machine and kit to Missouri to have Ray oversee my first installation of the kit. The directions in the kit are pretty straightforward and there are detailed pictures to follow, but it was not a fast process and I spent the whole morning on that project. Ray's approach to his advanced classes is that he lets you work on your own until you get stuck or until he sees you doing something that might hurt you or the machine. He is willing to answer any question that is asked, but he really does want to give you space and time to problem-solve on your own. I appreciate that. The installation went well and now the Nova control pedal does not race uncontrollably when she sews.
Bernina 830
The Bernina 830 came to me with a broken nose plate and a few scratches on her paint. Who knows what challenges she has faced over the years--perhaps a fall at some point?  The nose cover hinge was bent and the cover did not close correctly. This meant that the top cover would not close either unless it was forced and that was already starting to chip off more paint. Taking off the hinge and straightening it out was a great improvement, but it revealed that at some point this machine had actually had a replacement nose cover put on.  This new one is wider than the machine and it does not sit completely flush with the front and back. Since this is a machine for me though, I can live with the 'character' that this adds to the machine.
Simplicity 804 Serger

The serger turned into a time and labor intensive project. I was not privy to the history of this machine either and it seemed to have been tinkered with multiple times, possibly by multiple people. I don't know when the last time was that it actually worked, but it was hard to find a part of this machine that had not been tweaked at some point. This turned into a group project and two of my classmates were instrumental in figuring out how to get everything running smoothly again. I loved being able to consult with others across the table. Usually, I'm alone in my workshop---it sure was fun to collaborate in person.
Singer 301
The Singer 301 had frayed cords and the foot control got rewired. After a complete cleaning, lubrication, and tuneup she was sewing confidently. She came out of a cabinet and will go back in to that original one before I sell her.
Inside a Bernina 1230
The Bernina 1130 and 1230 were purchased after I knew I was going to Ray's class and I wanted to wait until I was in MO before I serviced them. Fortunately, it turned out they were both in great condition and just needed a cleaning and lubrication. I look forward to trying those out in the coming weeks. What are some noticeable differences between the two machines?
Singer 201-2
The last project was a Singer 201-2 that I had purchased earlier this spring. Last year I had a 201 that I wanted to repair, but it had too much rust inside the machine and the motor had water damage beyond recovery. So, this was a second chance to see why this machine is sought-after. A complete rewiring job, motor cleaning (such a messy job), and machine cleaning took me the entire last day of class. There are still several things I need to do on the machine now that I'm back home, but even without sewing on it yet I can see her start to reveal her charm and strength.

This class proved, yet again, to be a delightful way to improve my skill set. Ray, the other students, and the variety of projects available each time already has me looking forward to going back next summer.

Monday, July 3, 2017

Gray and White Striped Shirt

I was looking for a project to try out on the new Bernina 830.  I had done a couple small refashions, but I wanted to work from a pattern on this one.  The fabric was a knit white with gray stripes and came from mom's stash.  She bought it to make a maternity maxi-dress for my last year sister, but my niece was born before that project even got cut out.  I hadn't made a long-sleeve knit shirt in awhile, so I decided to give that a try.  I made the pattern from an old shirt that I had deconstructed so I could trace the pieces.  
The fabric was laid out on the front porch and I only had to shoo the cats away twice.  Fabric has a very intense 'come hither' look for cats, especially when it's laying in the sun.
Cutting the bottom along a stripe
I worked very hard to match up the stripes on the pattern pieces.  I thought the stripes should meet on the sides of the shirt and the hem should follow one stripe.  The side and shoulder seams were put in and finished with the serger.  One armhole may be a bit larger than the other as I did see some extra fabric under one sleeve hole.  I made some changes to the original pattern, but I'm going to see how this turns out in the end.
Good fit except for the armholes
Stripes match up pretty well on the side seams
Back view, stripes hang horizontal
Next, the full length sleeves were set in.
Bernina 830 had no trouble with this task

Sleeves
Neckline seam serged
I'd like to say that I planned to have the gray stripe run around the collar, but it was a happy surprise.
Gray stripe through collar
For the hem on the shirt I pinned it so that the gray stripe was at the bottom and hand basted it before finishing it with the machine.

The finished shirt has a good sleeve length and I added two inches to the body length.  I love having a shirt that will hang over the top of my jeans.  The scoop collar turned out well, buI think I need to add a bit more fabric to the upper arm next time.  I can move in the shirt, but I don't want to do any heavy flexing...would I do that anyway?  I'll make a few changes to my pattern and try it again.  Overall, I do like this shirt through and I think it will be in heavy rotation as it will do with about anything.

Front view

Back view
Gray and white striped shirt update:  I wrote this post back in February when I actually made the shirt, but didn't get the pictures uploaded until recently.  Since Feb, this shirt has indeed been a regular staple in my wardrobe.  I haven't gone back to revise the pattern and make an updated version yet, but this post reminded me that I want to do that.