Saturday, April 27, 2019

Dress from Lark Tee Pattern


This dress is a revision of the Lark Tee by Grainline Studio. I used my sloper pattern to change the armholes a bit and then I lengthened the shirt to a make a dress. I was hoping for something that could be worn with leggings in cooler weather and without leggings in the summer. The fabric came from Mom's stash. It is lightweight and has a good drape, but the colors seem to swing towards cooler weather rather than summer heat.The fabric was laid out on the dining room table and the pieces were quickly cut.
Adjusted pattern with skirt added
Cutting neckband from selvedge
There are relatively few seams on this dress and the shoulder seams were put in using the Bernina 1230.
Stabilizing shoulder seams
The side and arm seams were done with my relatively-new-to-me serger that a co-worker left with me earlier this year. I keep this serger threaded with black thread and my other serger threaded in white and I'm ready to serge at a moments notice.
Serger from co-worker
Even though this project went together relatively quickly, I did find myself using 3 different machines in the process. The third machine I used was my Bernina 730 to put in the hem. Mom was kind enough to pin up a proper hem length and then I put in two rows of zig-zag stitch to hold it in place.
Finishing hem using Bernina 730 Record
Two rows of zig-zag stitching
This dress went to work about a month ago when there was a hint of spring in the air. The lighting is terrible in my office, but it was the only place I had to take pictures. Most of these photos have been edited in some way, but the photographer (me) didn't leave me much to work with in some cases.
Very comfortable to wear all day

Length is a bit short if not wearing tights or leggings
Back view
The neckline is a bit of the lighter colored selvedge and it finished well.
Neckline is top-stitched
I am still not happy with the fit on the top of this dress. It it too tight across the back between the shoulders and I need to widen the distance between the neckline and the start of the sleeve on top of the shoulder. Is it in my skill set to modify the Lark Tee even more, or should I move on and try another pattern?
Shoulders are too narrow, sleeve starts too high

I really do like the fabric pattern and colors though. This dress pairs well with a jacket or cardigan and holds its own when needed. Thanks for letting me take this from your stash, Mom.


Friday, April 19, 2019

Spring Colors Quilt


This quilt was started in February. Most of the fabrics are from a Moda collection called Sunnyside Up by Corey Yoder, but there are several scraps and leftovers thrown in from other projects too. The Moda fabrics were part of a charm packet and I started by laying out the primary fabrics for all 25 blocks.
Already mixing in fabric from other projects
Then I started cutting pieces for the middles and corners of each block. Many fabrics are repeated in at least one other block of the quilt.
Mixing up colors within the quilt
I already had white for the sashing and I was able to incorporate some of the smaller scraps into strips within the sashing.
Adding sashing
All of the piecing was done on my Bernina 717. This one fits her table so well and turns out a beautiful straight stitch every time.

Not a free arm model
Once the piecing was finished, I had my assistant press the seams.

Lainie takes her job very seriously
After ironing the top, I basted the quilt together on the dining room table.

Layered for basting
Basted and awaiting a quilting pattern
For the quilting, I used my Bernina 1120. It was snowing in the middle of April on the day I decided to quilt. I turned my table so that I could see the flakes as I sewed. The living room does not have any overhead lighting, so I had to set up one of my Ott lights over the workspace.

There's snow outta them windows

Quilting wavy lines with using the walking foot
Ready for the wash
The finished quilt was photographed April 19th. There were a few hyacinth and daffodils out to pose with the quilt.
Quilt colors are flower colors
Quilting really pops on this one
Wavy line quilting viewed from back


Sunday, April 14, 2019

Silk Infinity Scarf


This should have been a quick project once I finally got started. The fabric was a remnant picked up at a sewing event. The tag indicated silk and there was just enough to make a scarf, so I brought the remnant home.
1.5 yds of light gray silk
I found a couple tutorials online for making infinity scarves and decided to try one of those methods.
So very soft
I sewed the scarf inside out twice before I got it sorted out. The twist inside- infinity piece- of this scarf was probably more confusing in my brain that it should have been. Third time was a charm and even though I'm still not sure why it worked, the scarf does loop correctly.
Finished length dictated by the size of the remnant
I love it when a project made with free fabric turns out wearable. This neutral color will be a great addition to a fair number of outfits.


Sunday, April 7, 2019

Shirt, Butterick 5526

At least 3 yards to start
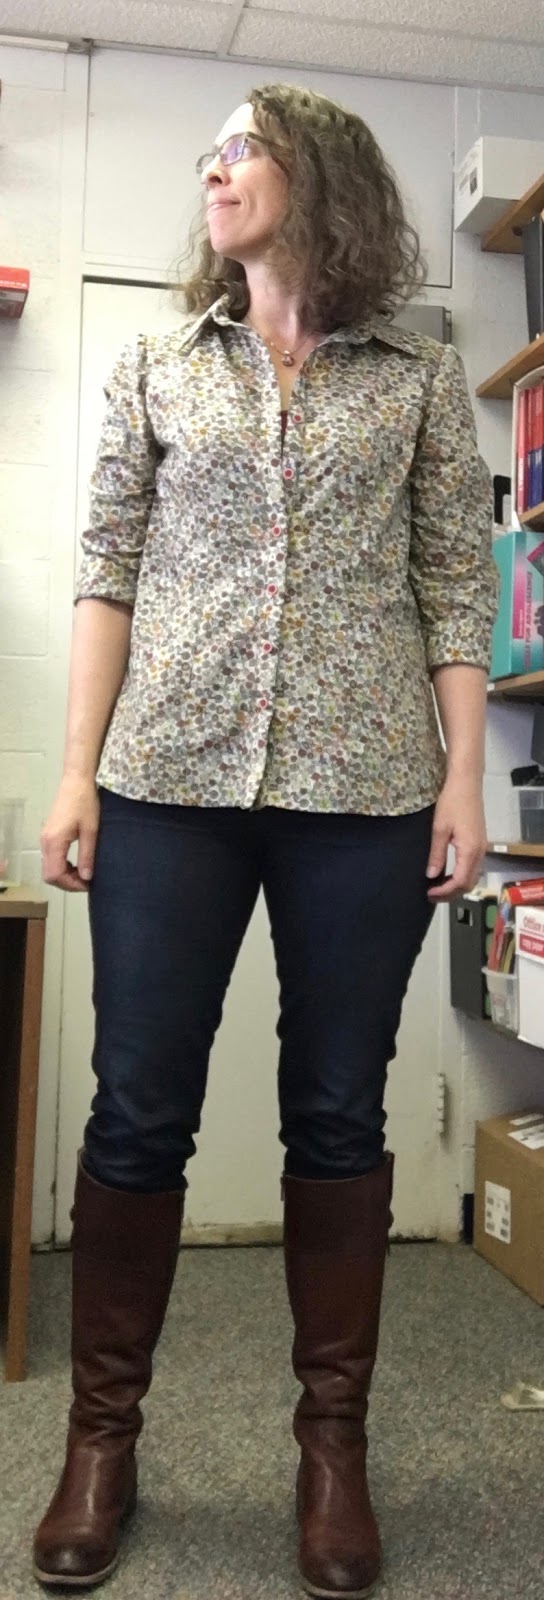
This fantastic fabric was purchased from Treadle Yard Goods in St. Paul MN a few years ago. Treadle is within walking distance from where one of my sisters lives, so we visit at least once when we're in the neighborhood. The pattern is Butterick 5526, a collared button up shirt. I cut view D in size 16 grading out to 18 at the hips. I also added 2 inches to the length. 

Staystitching the neck edge
The seams were done on my Bernina 717 and the edgestitching and topstitching was done on my Bernina 1230.
Topstitching on the princess seams
French seams for the sides
The hem was folded up 5/8" and then folded under again.
Hem
The front bands were attached and then edgestitched with the black thread.
Edgestitching on the Bernina 1230
It wasn't until I was actually putting the collar together than I noticed I had put interfacing on all four parts of the collar and collar band instead of just two. This collar will be extra supported, hopefully, not too stiff.
Collar and collar band
After attaching the first sleeve, I tried on the shirt to check fit. I forgot that the sleeves were designed to be elbow sleeves, and I didn't like the finished length. If I rolled the cuff up, then the length felt better. The other sleeve was finished and ready to be attached, should I go ahead and put it on or recut and sew up two new ones?
I don't like the 3/4 sleeves, will need to lengthen those next time
I decided to keep the original sleeves this time. The cuffs are now turned back and sewn to the sleeve. There is a second row of edgestitching along the placket and it looks purposeful.

Cuff turned back
When I first tried the shirt on, it also looked like the front sides of the shirt were very different lengths. Seeing it later draped on the dress form, it's clear that they are very nearly equal when draped correctly.
Ready for snaps or buttons
At the start of the project I was picturing snaps for this shirt similar to those pictured below.
Maybe I could find these in a brighter color?
These are not the ones I wanted to use though and 6 snaps would not be enough for the whole shirt. In the next photo I was trying out a set of red buttons. There was another card of these in my stash, so there would be enough for this project.

From the clearance bin at Joann
I opted for the red buttons and set up my Singer 201 and buttonhole attachment to make buttonholes.
Setting up for buttonhole
Finished buttonhole
There are 8 buttonholes total
I used some red quilting thread I had to sew on the buttons. I have no idea how quilting thread will wear for the long term, but it matched the buttons quite well.
Sewing on the red buttons
Here is the finished shirt with all its buttons.
Front of shirt, no ironing after half day of wear
Back view
Side view
I forgot to take off my ID badge for a few photos
The shirt got paired with jeans and boots for work. No glam shots were taken, but I did get a few pics in the math office next to my classroom. I really should scout out a more lighting/background friendly space for pictures.


Tough angle for the camera
Comfy all day