Showing posts with label Style Arc. Show all posts

Thursday, July 23, 2020

Green Denim Twill Lander Pants


Lander Pants and a Blaire Shirt
Here is another Lander Pant pattern, version number 50 or so. This is definitely a TNT pattern for me now and I am really happy with how it fits overall. The fabric is from a woman in Northbrook who was de-stashing and generously offered to let me try anything that looked interesting. It is a green denim twill and I thought it was a perfect weight with which to try the Lander Pant pattern again. I had been working on perfecting the fit of the shorts and I wanted to try the pants, but hadn't had any suitable fabric. Since social distancing started, I have only shopped online once, choosing instead to use fabric and supplies I already have at home. I am pleased to be able to say that these pants were constructed entirely of notions that were already in my collection.

The front pocket lining is a quilting cotton from Nancy K's stash, the buttons were in a sewing cabinet that came from a garage sale, and the thread came from Cedar Rapids, IA.

I don't have any construction photos of these pants because I have sewn this pattern many times and often forget to pause and take pics. I had my Bernina 717 set up for seams and the 1120 set up for top-stitching. I also used my serger for finishing seams and the hem. My Singer 201 did the buttonholes.

There are finished photos though, taken while I waited outside the urgent care clinic. My neighbor was inside getting a COVID test and no one is allowed to wait in the lobby so when it stopped raining I starting walking laps up and down the block. At some point I realized I was wearing my recently finished pants and a Style Arc Blaire Top so I decided to do an impromptu photo shoot. The lighting alternated between a bit too dark and a bit too light and the focus was sometimes off, but it was not bad for just propping my phone on various ledges and setting the timer. Also, if this had been planned I probably wouldn't have modeled while wearing my garden boots.
At least I'm in comfy clothes if this ends up being a long wait
Back pockets were cut with the selvedge as the top
I can squat and not worry about revealing anything with these high-waisted pants
I made the mask, shirt, and pants
Camera angle makes me look like I'm slouching
Nice big pockets for my phone
There were only 5 of these buttons and that worked out perfectly
Range of motion is great
Didn't get my head in this shot

Tuesday, July 14, 2020

Liberty of London Blaire Shirt

On a sunny day
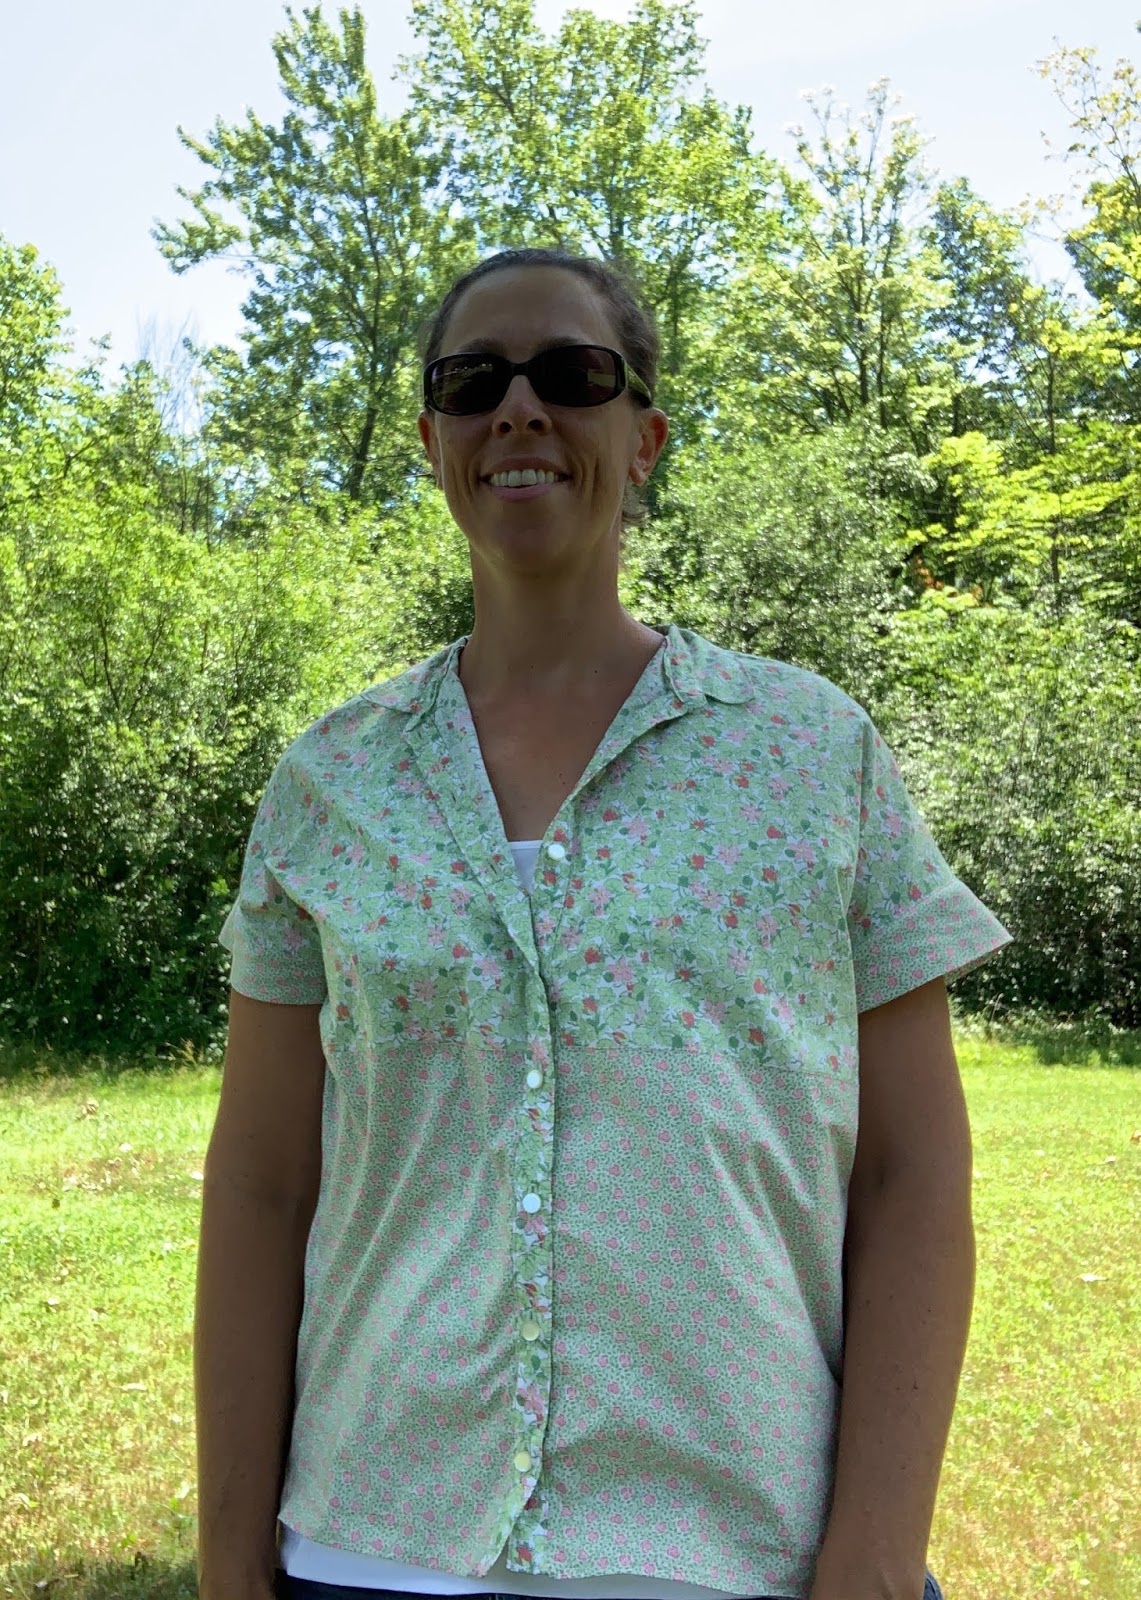
The Liberty of London Tana Lawn cotton fabric came from an estate sale in 2019 and there wasn't enough of either pattern to make a full shirt so I paired them together. The fabric I used for the top, collar,  and the front button panel has strawberry plants on it and the fabric for the bottom and sleeves has pink roses.
Layout for cutting

The Blaire pattern is one I have used before and this time I opted to lengthen the shirt 1.5" and leave out the side panels. Construction was pretty straight forward and I used french seams on most of the project. The shirt was finished at the end of June, but buttons had to wait another couple weeks.
Shirt without buttons
The buttonholes were done on the Singer 201 using green thread and I finished putting on the buttons during the July meeting of Loose Ends. The buttons were from my collection and I used all 8 that were on the card. The buttonholes are vertical because they were too wide for the button panel if set horizontally.
Buttonholes ready to be tied off and cut open
A cup of tea while I tied off buttonholes
Finished buttons
The top-stitching was done in pink thread.
Top-stitching
The finished pictures were taken at the forest preserve. I had been driving in the car for two hours and needed to get out and stretch my legs. The wrinkles in my shirt are from sitting so long.

Shirt blends in with background

The length is great now, but next time I will either add the side panels back in or lower the side hemlines. Right now, I have to wear a cami under this shirt so that I'm not showing skin on my sides.

Lower the side hem
Two wrinkled fabrics on the back
These two fabrics work well together

Saturday, March 14, 2020

Kendall Knit Top from Style Arc

New pi day shirt
Yesterday was the Friday the 13th and the last day of school for two weeks. This Monday, teachers will be at school for the day preparing for e-learning and then school will be done remotely for the rest of the week. Last Thursday, when we found out that school was closing to minimize the spread of the Corona virus, I stopped off at Mom and Dad's for a quick visit before we started self-quarantining. Even though I will be working from home next week, I should have a bit more free time than usual in my day and I hope to spend a good amount of it sewing. Mom lent me one Style Arc shirt pattern that I wanted to try and she let me to take a few fabric options for possible projects later this week.
Pattern and swatch
Last night, I read over the Kendall Knit Top pattern instructions and a few reviews online. Mom had a size 14 pattern cut and modified a bit, so I decided to start with that. Mom mentioned that on the shirt she had made, the front didn't lay flat and the front hem hiked up a bit. I saw pics online from a woman who lengthened the collar in hopes that the area where it crosses over in the front wouldn't bunch up. I added an inch to both ends of the collar piece mom had made and originally meant to change the hem line, but forgot to do that. In mom's notes she said that she had taken in the side seams 1" and taken out the waist shaping. I added the shaping back in when I cut out my fabric.

Collar piece with additions to the ends
The fabric is from Lillian's remnant bag, I think. It's a blue and white stripe knit with a good weight to it. There is a definite fabric smell that I hope comes out in the wash. Otherwise, I may tear up if I have to wear it for any length of time. The cutting went quickly this morning and I did cut the back neck facing, but did not end up using it. I see where it is supposed to go, but all my seams were serged and the inside of the collar is not visible behind my neck, so I omitted the facing in the final construction.
The staystitching, hem, bodice facings, and sleeve hems were done on my Bernina 1120, but all seams were finished on my Brother 1034D serger. There are not a lot of directions for construction, but everything fit together well and it sewed up smoothly.
Inserting a sleeve
Finished pictures were taken in the backyard. There was a chance of snow today, but no flakes appeared. It's cloudy and cold though, so pics were snapped quickly.

That bird is admiring my shirt
Front hem does not pull up
Back is a good length
Next shirt will have longer sleeves, I don't love the 7/8 length
Very pleased with the final shirt

Saturday, December 7, 2019

Style Arc Marie Jacket

Marie Jacket
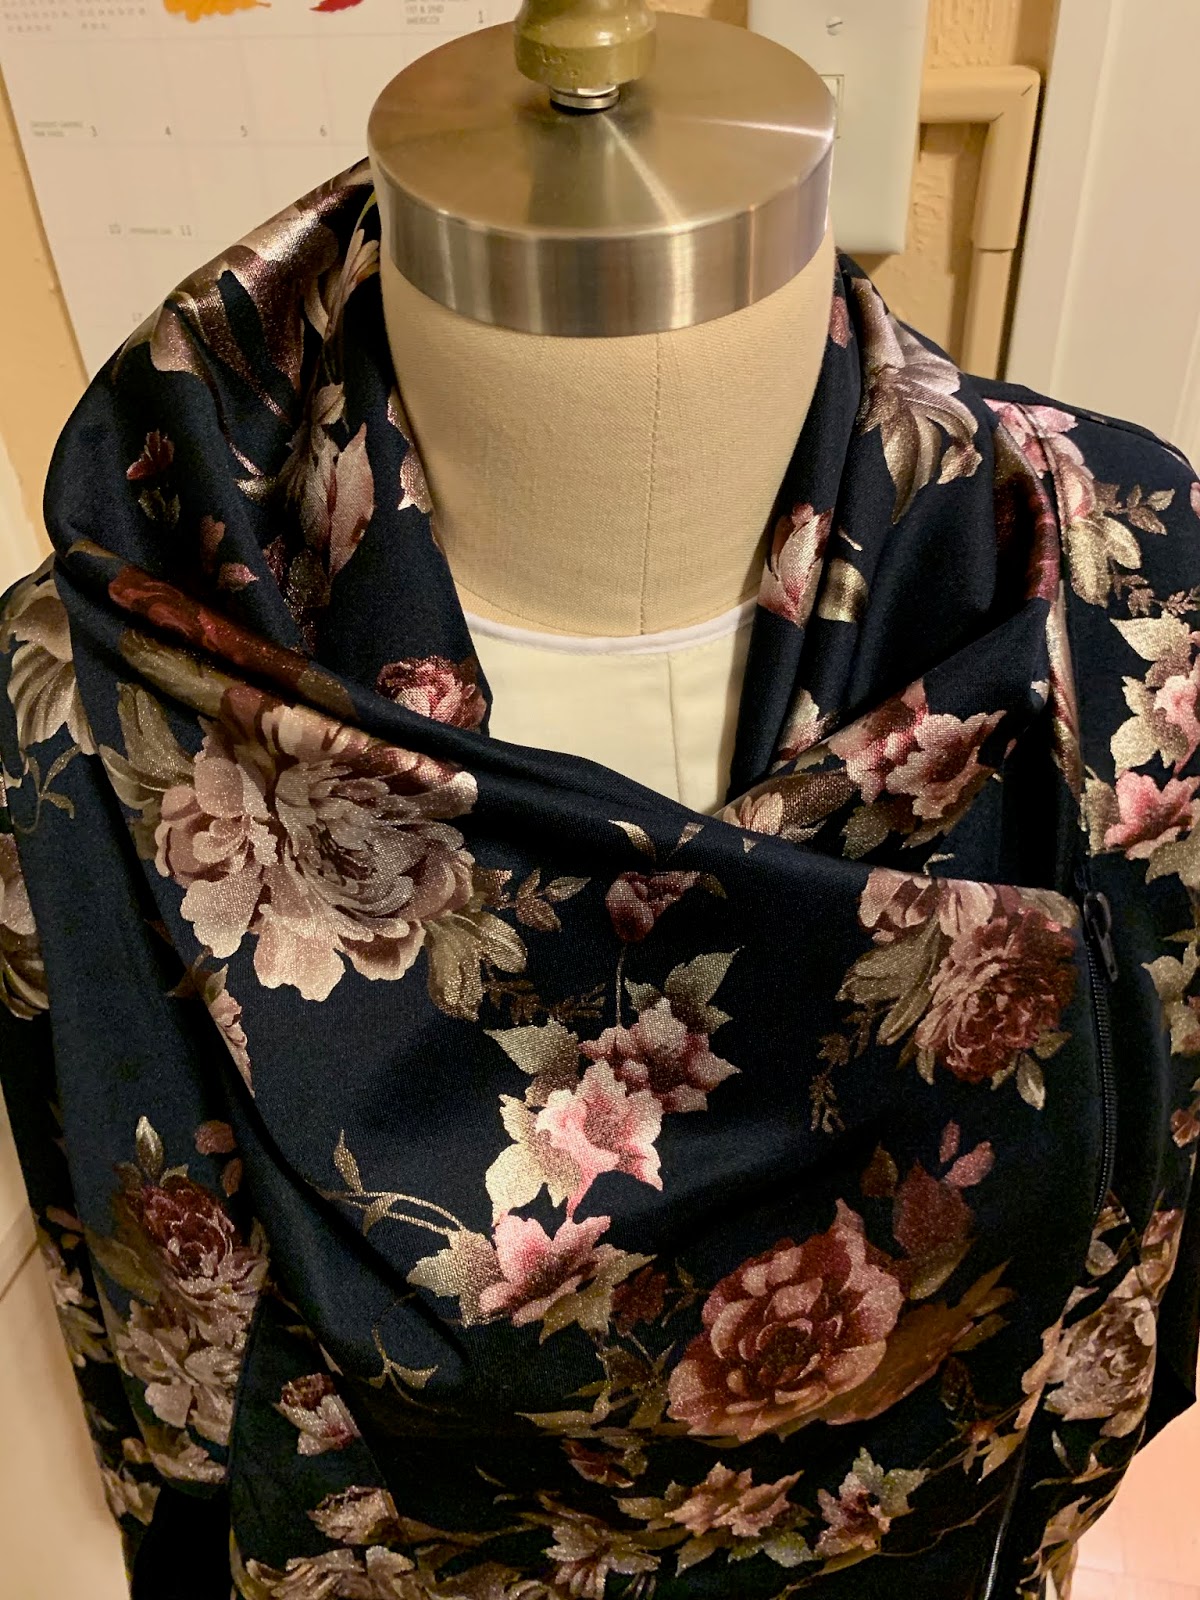
The fabric is a shiny floral ponte from Joann's.  I think I bought it last year and was planning to make a dress, but then decided it would get worn more often as a jacket.

I made this pattern a year ago with purple knit I got from Ginny's in Rochester. That first jacket fit a bit tighter than this version, but I found that I wore it regularly and wanted to try the pattern again. The Style Arc pattern, Marie, is one of mom's and I borrowed it to trace out and sew up a size 14. The first time I made this jacket, I had trouble following the sewing directions and I ended up making myself a post-it note with reminders on it in case I used the pattern again. These reminders came from blogs and pattern reviews that I had read while researching this pattern and from my own errors while assembling the jacket the first time. For example, I remember having to take out and reset the zipper on the first jacket and then deciding it was just going to stay 'a bit wrong' after the second attempt.  The notes were handy the second time around and I was glad I had taken time to write then down.

The sleeves on my original jacket were too short, so I lengthened them 2" before cutting this time. That's the only change I made to the pattern. I didn't have quite enough of the floral ponte, so I had to get creative with the layout. One of the back pieces has part of the selvedge in it and that's visible along the center back seam. Not a worry for me though, it just ensures that no one else will have a jacket like mine. I also made no attempt at pattern alignment. There was little-to-no spacing between pattern pieces so flower placement was not a consideration.
It was a tight fit with the pattern pieces
I used my Bernina 1230 and my Bernette 34D serger to sew this jacket. The sewing machine had navy thread and the serger had black thread. Both machines handled the fabric well.
Serged yoke and center back seam
Top-stitched yoke seam
The zipper is from Vogue Fabrics. I had cut out the jacket and was already sewing it together when I realized I didn't have a compatible zipper. My only options at home were short invisible zippers or a white separating zipper. Vogue does not keep a very wide selection of zippers in their Evanston store these days. The pattern called for a 17" separating zipper, but I went with a navy blue 18" as it was the only one I could find. Knowing that I had to do the zipper twice on my first jacket, I took extra time to set this one in and I'm pleased with how it turned out. It is top-stitched to hold the seam flat.

One note I gave myself last time was to set the sleeves in flat and I did that again this time. They went in easily and those seams were finished with the serger. I think this helps avoid extra bulk around the shoulders and under the arms. Another note I had was to make sure the zipper did not extend into the hem and I double-checked the placement before sewing in the facing.
Facing on the neckline
Before side and sleeve seams are in
After sewing in the facing, I flipped it right-side out to check flower placement.  It looked like the two big pink flowers would be in the center, not on my chest, so I was happy with that placement.

Back and sleeve length are good
I have worn this jacket several times already and never got around to putting in a snap or hook and eye inside to hold the flap under the zipper closed. Currently, a safety pin is employed when needed and I'm not in a hurry to upgrade that fastener.
Hangs nicely when front is left open
Back seam is visible with selvedge
This is a very comfortable top and I'm sure I will make it again with other fabrics.


Friday, August 9, 2019

Floral Blaire Shirt, Guest Post from Linda


Guest post from Linda, Courtney's mother and fellow vintage sewing machine enthusiast.

We've had some uncomfortably hot and humid weather here in Illinois lately, the kind of mugginess that makes the thought of a clingy cotton or cotton/lycra knit shirt sound like something to be avoided. There were no floaty, cool cotton woven shirts hanging in my closet, but I remembered some fabric that had fun possibilities. Simple pattern, should only take a few hours...
Blaire shirt patterns
The StyleArc pattern line is terrific in that you get so many sizes in one envelope. The drawback is tracing the size you want onto patternmaking paper and cutting it out before getting to start with the lovely shirt fabric. No matter, has to be done.
I don't have the collection of sewing machines that Courtney does, but once one does come through the front door, I'm reluctant to turn it loose. So although I could have done the whole shirt on my Bernina 1130, it seemed a lovely idea to see what a few other machines could do. 

Bernina 1130
The shirt construction went along smoothly. The fabric was so light I chose French seams because they'd be sturdy and add no bulk. The shoulder seams and front plackets were serged, reminding me how lovely my Babylock Imagine handles that sort of finishing work.  

Finished seams
Buttons and buttonholes were promising to be the interesting part. Plan A--buttonholes using the Singer 401A and the "Professional Buttonholer Attachment?" Sounded good, and after an hour of figuring out the attachment, the sample looked good. Oops, there was no template in the box that was small enough for the little shirt buttons.  
Singer 401A
Plan B--the Necchi BU. I love this machine. It's so powerful yet purrs softly while sewing. The buttonholer that fits this machine has a small template. I put away the 401 and set up the Necchi. Lovely. Unfortunately it cannot drop its feed dogs, and the screw for the coverplate didn't fit. Drat.    
Necchi BU
Plan C--the Singer Featherweight. I have a Singer buttonhole attachment that fits. To my credit, it was immediately apparent that since the Featherweight cannot do its own zigzag stitch, it would need a highly specialized buttonholer that I do not have.
Featherweight
Last job is sewing on the buttons. I knew that the job could be reliably done by machine, but hadn't tried that in several years. A button foot that is slightly sticky is helpful to keep the button from sliding around, and I have a brand new one for my Necchi BU. But it can't work without the aforementioned coverplate. Sigh.
Rather than going directly to my thimble and handsewing these little buttons on, I returned to the Bernina. Regular zigzag foot, ten minutes, and the buttons were on.

Bernina did a professional job
Finished shirt, worth the entire learning experience. I'd forgotten how comfortable a floaty cotton can be! Plus, I got to play with all my machines, a good thing in my book.    
Perfect shirt for the garden
It fits beautifully