Saturday, July 25, 2020

Messenger Bags for Nieces


Three of my nieces have birthdays in June. This year, my niece who lives locally got a jar of homemade strawberry jam and my nieces in MN got mini messenger bags. The jam is made from the strawberries that grow in my yard. Etta has come over a few times to pick her fill of berries and I thought she might enjoy having her own jar of jam as a treat when strawberry season ends. For Gracelyn and Eliza, I found some brightly colored fabric and a free pattern online and made up two messenger bags in one day. They were fun to put together and I hope the girls find them at least somewhat interesting.
The fabrics had been donated and it was a treat to find them in my stash. The ladybugs and both bag linings came from a lady here in Wilmette and the bright floral came from a co-worker's mother who was paring down her stash. The pattern called for iron-on interfacing, but I used some upholstery/curtain fabric instead and I'm pleased with the structure it provided for the bag.
Fabric for two bags
I made the bag pockets the same size, but varied the flap and strap lengths.
Top-stitching the covers
Both of these were sewn on my Bernina 1120 and I switched back and forth between two colors of thread to do the topstitching. The upholstery fabric I used for interfacing in both bags is the floral in the picture below.
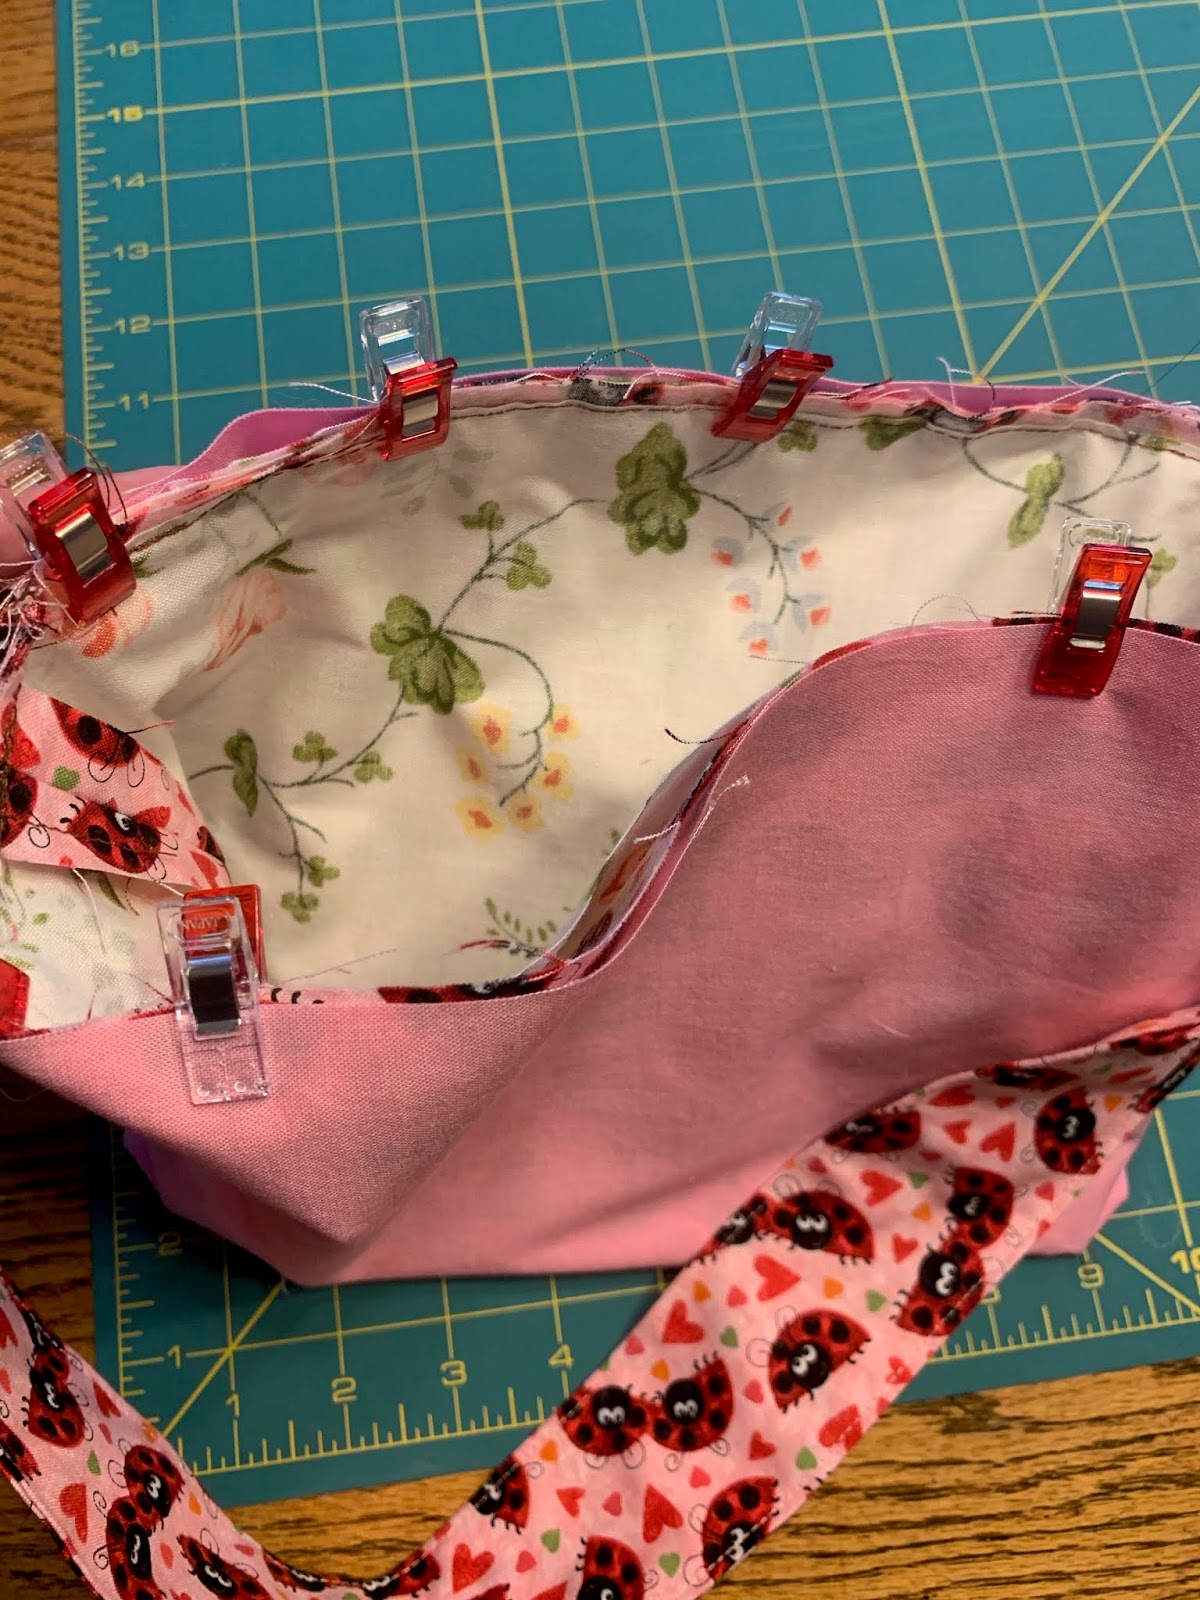
Pinning the interfacing, fabric, and lining
These bags have no closures to hold the flap down, but I thought my nieces would appreciate easy access to whatever 'valuables' they chose to carry in their bags.
Strap is a bit shorter on the ladybug bag
Pink lining
I had Eliza in mind for this one
Floral bag has shorter flap and longer straps
Yellow lining
The bags were mailed out and arrived during their birthday week. I think those smiles mean these bags were a hit with the girls.

Gracelyn with her bag
Eliza and Gracelyn with their bags packed and ready to go

Thursday, July 23, 2020

Green Denim Twill Lander Pants


Lander Pants and a Blaire Shirt
Here is another Lander Pant pattern, version number 50 or so. This is definitely a TNT pattern for me now and I am really happy with how it fits overall. The fabric is from a woman in Northbrook who was de-stashing and generously offered to let me try anything that looked interesting. It is a green denim twill and I thought it was a perfect weight with which to try the Lander Pant pattern again. I had been working on perfecting the fit of the shorts and I wanted to try the pants, but hadn't had any suitable fabric. Since social distancing started, I have only shopped online once, choosing instead to use fabric and supplies I already have at home. I am pleased to be able to say that these pants were constructed entirely of notions that were already in my collection.

The front pocket lining is a quilting cotton from Nancy K's stash, the buttons were in a sewing cabinet that came from a garage sale, and the thread came from Cedar Rapids, IA.

I don't have any construction photos of these pants because I have sewn this pattern many times and often forget to pause and take pics. I had my Bernina 717 set up for seams and the 1120 set up for top-stitching. I also used my serger for finishing seams and the hem. My Singer 201 did the buttonholes.

There are finished photos though, taken while I waited outside the urgent care clinic. My neighbor was inside getting a COVID test and no one is allowed to wait in the lobby so when it stopped raining I starting walking laps up and down the block. At some point I realized I was wearing my recently finished pants and a Style Arc Blaire Top so I decided to do an impromptu photo shoot. The lighting alternated between a bit too dark and a bit too light and the focus was sometimes off, but it was not bad for just propping my phone on various ledges and setting the timer. Also, if this had been planned I probably wouldn't have modeled while wearing my garden boots.
At least I'm in comfy clothes if this ends up being a long wait
Back pockets were cut with the selvedge as the top
I can squat and not worry about revealing anything with these high-waisted pants
I made the mask, shirt, and pants
Camera angle makes me look like I'm slouching
Nice big pockets for my phone
There were only 5 of these buttons and that worked out perfectly
Range of motion is great
Didn't get my head in this shot

Tuesday, July 14, 2020

Liberty of London Blaire Shirt

On a sunny day
The Liberty of London Tana Lawn cotton fabric came from an estate sale in 2019 and there wasn't enough of either pattern to make a full shirt so I paired them together. The fabric I used for the top, collar,  and the front button panel has strawberry plants on it and the fabric for the bottom and sleeves has pink roses.
Layout for cutting

The Blaire pattern is one I have used before and this time I opted to lengthen the shirt 1.5" and leave out the side panels. Construction was pretty straight forward and I used french seams on most of the project. The shirt was finished at the end of June, but buttons had to wait another couple weeks.
Shirt without buttons
The buttonholes were done on the Singer 201 using green thread and I finished putting on the buttons during the July meeting of Loose Ends. The buttons were from my collection and I used all 8 that were on the card. The buttonholes are vertical because they were too wide for the button panel if set horizontally.
Buttonholes ready to be tied off and cut open
A cup of tea while I tied off buttonholes
Finished buttons
The top-stitching was done in pink thread.
Top-stitching
The finished pictures were taken at the forest preserve. I had been driving in the car for two hours and needed to get out and stretch my legs. The wrinkles in my shirt are from sitting so long.

Shirt blends in with background

The length is great now, but next time I will either add the side panels back in or lower the side hemlines. Right now, I have to wear a cami under this shirt so that I'm not showing skin on my sides.

Lower the side hem
Two wrinkled fabrics on the back
These two fabrics work well together

Tuesday, July 7, 2020

Denim Quilt

Denim quilt
Part of this top came from a co-worker's mother. Ethel was beginning to downsize her collection and the start of a denim quilt was amongst the fabric pieces. It was too small to use as is and I had to figure out a way to add to it. Fortunately, between mom and I there was plenty of denim fabric to repurpose. I used pieces from several pairs of jeans that mom shared with me along with some pieces that my friend Nancy had given me to make two rows of stacked coins. This widened the quilt top by about 19 inches.
These three columns each have a decorative seam with red thread running down the center.
Lainie helped me cut coins for the middle columns
Pressing seams open
Squares meet coins
There was one pair of pants from Nancy that had a bleach stain on them. I debated whether to cut around the stain, but then decided that I really did like the look of it and ended up putting it in the center of one of the coins.
Finished top
I basted the quilt on my back patio and used a flannels sheet from mom as the batting. The backing is pieced from quilting cotton that also came from Ethel.
I don't have any industrial machines so I was very excited about sewing on this one
For the quilting, I took this quilt with me to visit Pat in Iowa. She let me use her Consew 210 and that machine had no problems at all with the multiple layers of denim at the seams. I did straight lines 3 inches apart on the coin columns and 2 7/8 in. apart on the columns with squares. There are no seam guides on the Consew 210, so I made a few marks along the proposed lines and then estimated what would be straight.
Connecting the purple pen marks
At the table with a view
Quilting was done in a blue denim thread
Pat suggested basting the edges so that the layers wouldn't slip because originally I was planning to bring the quilt home before making and putting on binding. Before I got things packed up though, Pat offered some blue bias tape for binding and it was the perfect color. So, I trimmed the edges and used the Consew 210 again to finish the binding.
Binding is done
These finished pictures were taken when I got back home. 
In the garden
Backing is two pieces of cotton
Looks inviting for a picnic
You can see red stitching and some blue quilting lines