Wednesday, April 29, 2020

Chicago Tribune Article

My name was in the paper. Early last week while I was working in the garden, a reporter from the Chicago Tribune called to talk about fixing machines, making masks, sourcing materials, and the resurgence of sewing. We had a very nice chat and then the reporter followed up with several other sources for her story. On Friday evening a photographer came by in PPE to take pictures of my workshop. I was very impressed with the professionalism and the friendliness of both the reporter and the photographer. They are both very good at their jobs and very invested in the stories and communities about which they are reporting.
This past Sunday morning I saw the article posted online with 5 pictures. Victoria sent these pics of each one of the photos.


https://www.chicagotribune.com/coronavirus/ct-coronavirus-face-masks-elastic-shortages-20200425-cuh2orzfnvesda4xha4mi7lp6i-story.html#nt=msftsearch

Then Monday morning mom texted a pic of the article in the printed paper. A couple friends, neighbors, and co-workers texted or emailed throughout the day to say that they had seen the article. It was so nice to hear from people I haven't been able to meet with in person for at least a month.
Printed copy
Since the article appeared on Monday, I have had several calls about machines. After my Elearning is done for the day, I work on machines in the evenings. It feels good to get these machines working for people who are sewing masks and PPE, who are sewing for therapy while distancing at home, or who are exploring a new medium for their creativity.


Sunday, April 19, 2020

Another Bird Shirt and Pants


This fabric for the cami was left over from a shirt I made years ago. That one frayed so much that it ended up in the donation bin. This time, I have a getter understanding of how to finish seams and hems. I used my hacked Ogden Cami pattern and then made a couple more changes to this time around.  Since this fabric was very see-through, I made a full lining this time and used two layers of the bird fabric. Now you can see birds through the top layer, but you don't see my skin. Due to fabric limitations, the lining is about an inch shorter than the cami.
Lining is more birds

The straps are black ribbon. I didn't want to have to try to turn this fabric into narrow straps, so I found an alternative. One strap doesn't lay flat against my body, but I think that has to do with my slightly uneven shoulders.
Front view
Side view, still a good fit in the armscye

I still want to raise that back neckline for next time
The trousers are a black stretch twill from Vogue and the Sasha Trouser pattern from True Bias. These are a wearable muslin so unfortunately, they have no pockets. Fortunately, they fit well and I can put pockets in the next pair.
I would wear these with a cardigan or sweater so that I have some pockets
Side view

I did make the waist higher for this pattern
Difficult to photograph black fabric
Back view
Not wrinkle free and maybe next pair will get a little more room in the seat


Saturday, April 11, 2020

Ogden Cami from Repurposed Linen, True Bias

In December, Victoria offered up some of my brother's clothes before she put them in the donation box. Mom took some wool pants and I took a pair of the linen dress pants. I think I would like to wear more linen, so this seemed like a low risk way to start sewing with it.
They started as Banana Republic dress pants
They are brown with a lighter color stripe in the pattern


 I started by laying out the Odgen Cami pattern pieces to see if the leg width would give me enough fabric. I was ver close on the front piece, but no for the back piece. I had to get creative with deconstructing the pants and then piecing things together to get the fabric sizes I needed.
Inside of a pant leg, lining ends above the knees
I took both legs off and here's what was left
I also salvaged the four buttons and zipper for future projects
Once the legs were completely disassembled, I decided to cut the leg length in half and the sew those two pieces side to side. I carefully pinned along a strip in the pattern, but linen is slippery and things moved around when I was sewing. No worries, I like the look of seams on this repurposed fabric.
Pinning along the lines
Now it should be wide enough for pattern pieces
Fitting the back piece
Back cut and basted

Sewing in the lining
 The lining is made from two different cotton quilting fabric scraps. I had been making face masks for the last couple days and these were some of the larger scraps that I had left.
Top-stitching the neck-line
Raised front neckline
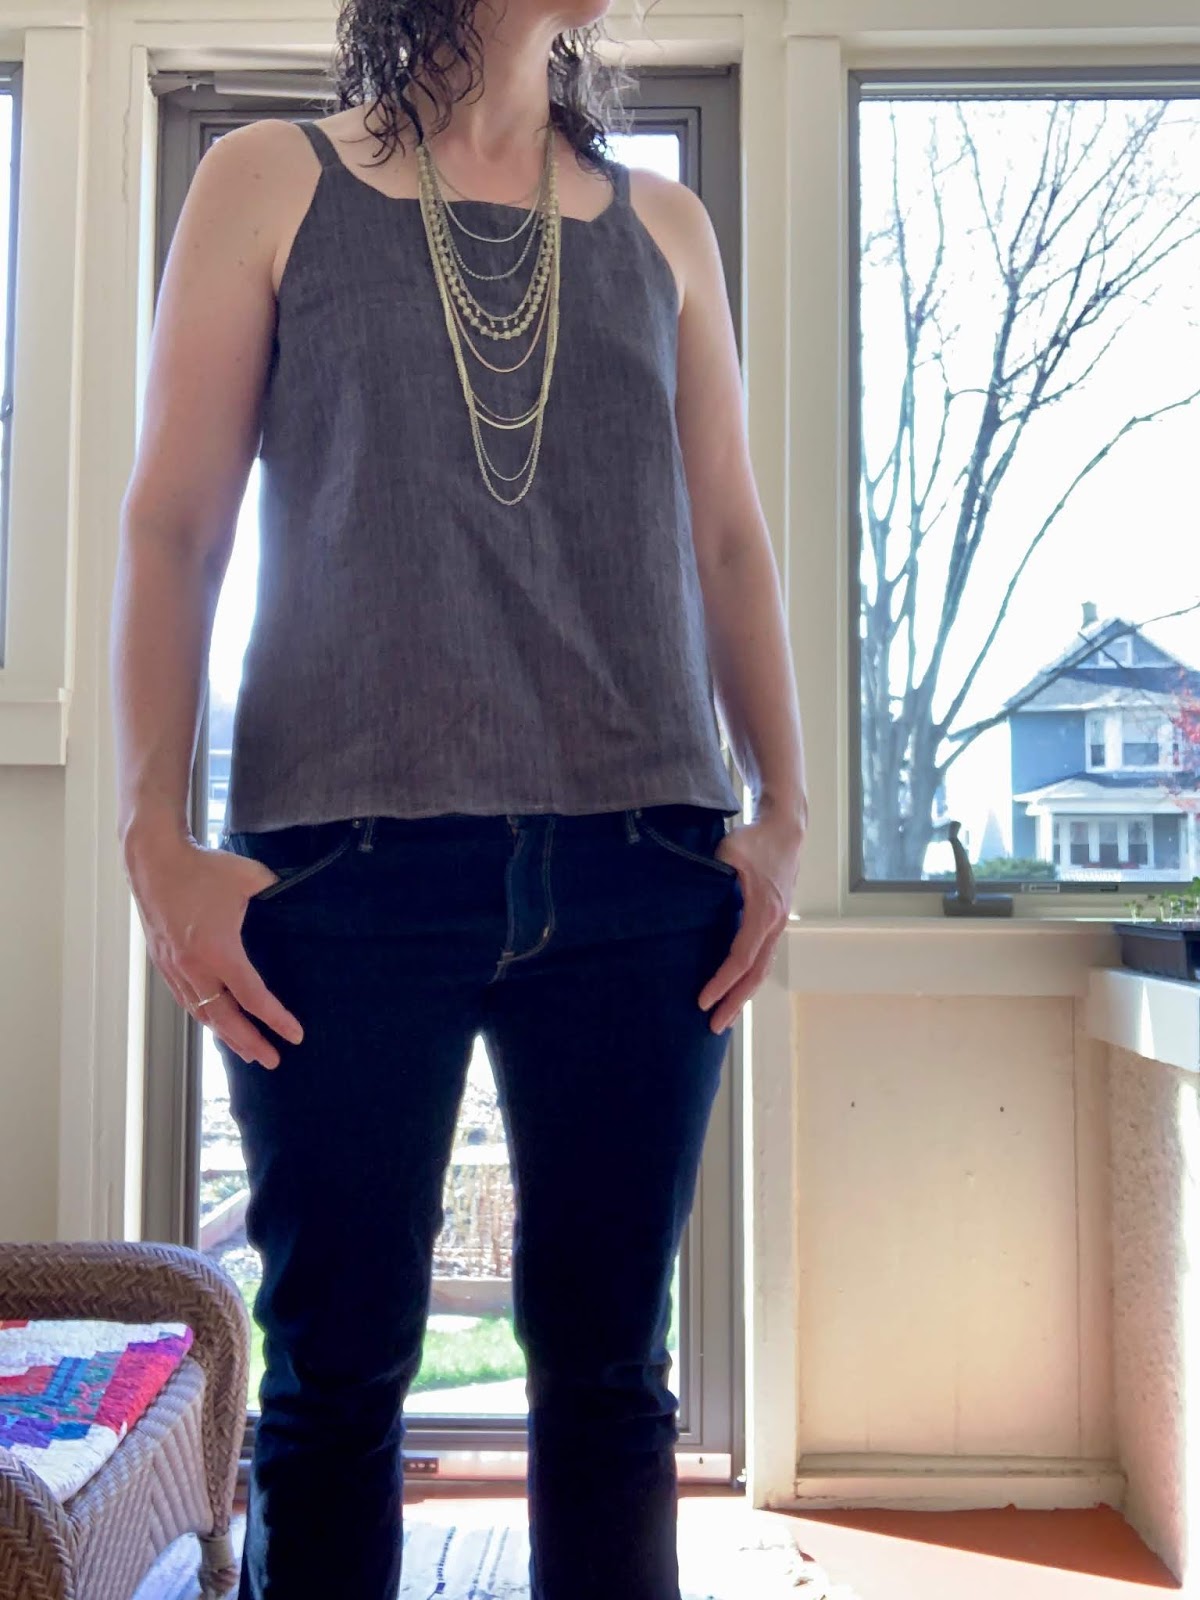
I changed the front neckline, squaring it off from the v-neck and the straps ended up twice the width of the original pattern. After cutting and sewing the first strap, I was unable to turn it inside out so I made two more each a quarter inch wider. Turning those inside out was not a problem.

The cami was finished recently, but it won't be warm enough outside to wear it outside for several more weeks. Pics are again on the self timer as we're still social distancing.

Maybe next time I'll raise the back too
Stripe matching is pretty good on the front
Fits well in armscye
We got sun today too


Wednesday, April 8, 2020

Face Masks

The call has gone out for all sewists who are willing to help to sew face masks for people working in hospitals, nursing homes, pharmacies, public service, and for personal use. Mom and I have been trying out several different styles and tutorials for making masks.  We have plenty of cotton fabric, but shape of the mask, type of straps (elastic or cloth), and size of mask have been variables.

Early versions
After those first few, I tried several different versions. There were so many tutorials, patterns, and directions available online.
This bunch that mom and I made were sent to Andy's nephew in NY
Karen from Sew on Central generously dropped off some extra elastic and I used it to make more masks. Those went to the drop-off bin outside her store.
Extra elastic
At this point I was pretty consistently making the pleated rectangle masks.
Perfecting the pleats
A few days later a neighbor asked for a couple masks for her and her husband when they went out to run errands. I walked a few over and left them on the front porch.
Walking these over to my neighbors
The last batch I made included some for another set of neighbors and then more for donation. At this point I'm low on elastic and have switched to cloth ties.
Serged cloth ties waiting for masks
Masks delivered to the neighbors


Sunday, April 5, 2020

Tie Dye Doll Clothes, Guest Post from Linda

Another of the occasional guest posts by Courtney’s mother, Linda.

A short time ago I found to my chagrin that there were 18” dolls in the family that were literally going naked. Poor little things, and me with an excess of fabric. One particular request was for something tie dye. In all my stacks of fabric, I had only one piece of tie dye—a knit shirt in a size youth large with printing on the front.
Shirt to be repurposed
I started with a free online pattern for the t-shirt (Trendy Tee from Pixie Faire). After making a test shirt out of red knit, I redrew the neckline to cover the cloth body of the doll, lengthened it a half inch, and extended the backs to have a facing to which I could attach snaps. I find Velcro to be hard on dolls’ hair.
Version 1, low neckline
Version 2, higher neckline
There wasn’t a lot of fabric in the tie dye shirt, and I had in mind two pairs of leggings and two long t-shirts. Certain sewing standards had to be put aside for this particular project. As luck would have it, both front and back of the shirt were dyed identically. I have no idea how that was accomplished, but it was the key to making this layout work. Each doll shirt front used the center of the spiral, one from the front and one from the back. The front was turned inside out to hide the printing, but that really doesn’t show.

The backs of the shirts look as if they were carefully pieced with an elegant little yoke. Nope—I used the short sleeves and had to include the shoulder seams of the original shirt. Both backs are different, but both are perfectly matched and striking. The cap sleeves were carefully cut so that they continued the colors from the shirt front.
Orange and purple back
Yellow and green back
The leggings were straightforward, although one piece had to be cut inside out to avoid the printing.
Playing with pattern placement
From the one t-shirt, two doll outfits were created. I only have one model in-house, so it was a brief photo shoot. The outfits are now in the mail on their way to their new home in Minnesota. 
Two completed outfits
Update 4/8
The clothes made it to MN. 
Tie dye in MN